
The Advanced Markup feature allows users to easily create customized markup rules based on specific conditions. These adjustments will seamlessly update your marketplace or order management system during the order "writeback" process.
The markups or markdowns can viewed in the Shipping Window if the “Is Reseller” setting under Advanced Settings for the selected Profile, is enabled.
- In the Shipping Cost Markups section, Select “Advanced” from the Markup Type dropdown menu.

- Click the [Manage Advanced Markups] button.

- The Advanced Markups menu will appear.

Manage Advanced Markups
Click ![]() to add markups, modify existing markups, or delete markups.
to add markups, modify existing markups, or delete markups.
- Click
 to add markup or markdown rules to the list of existing markups or begin a new list.
 - To edit an existing markup option, click the
 button.
 - To delete an existing markup option, click the
 button.
The Markup Fields
Market Type
The following are the Market Type options:
- Percentage of Amount Added (default) – This option will raise the shipping cost by incorporating a specified percentage of the final shipping cost into the shipping charge.
- Example: use this option for adding a 2% fee to the shipping charge if all conditions for the markup rule are met.
- Flat Amount Added – This option will raise the shipping cost by adding a specified fixed amount to the final shipping cost.
- Example: use this option for adding 50 cents to the shipping charge if all conditions for the markup rule are met.
- Set Amount – this option will override the returned carrier rate with a specified shipping charge that will if all conditions for the markup rule are met.
- Example: UPS has provided a shipping rate of $10.55 for a domestic order through UPS Ground, weighing 2.5 pounds, and valued at $25.00. If the conditions of the markup rule are satisfied, DesktopShipper will apply a Set Amount markup of $15.00 for UPS Ground shipments weighing over 1 pound and valued over $20. Consequently, the $10.55 UPS shipping charge will be overridden, and a $15.00 shipping charge will be communicated back to your order management system.
- Discounted percentage of Amount Subtracted – This feature allows for reducing the shipping cost by deducting a specified percentage from the final shipping charge.
- Example: use this option for subtracting a 2% discount from the shipping charge if all conditions for the markup rule are met.
- Discounted Flat Amount Subtracted - this feature allows for reducing the shipping cost by deducting a specified fixed amount from the final shipping cost.
- Example: use this option for subtracting 50 cents from the shipping charge if all conditions for the markup rule are met.
Markup/Markdown Value – the percentage or dollar amount specified for the selected Markup Type setting.
Rate Type – An option available to only apply the markup rule to either Negotiated or Published rates, specifically affecting UPS or FedEx rates. The default selection is "Negotiated".
Carrier – Use this option if you wish for the markup rule to be applied to a specific carrier. In cases where a Carrier Code setting is not established, this option will extend to all services offered by the selected carrier.
Carrier Code – Use this option if you need the markup rule to apply to a specific carrier service.
Carrier Account – If you have several carrier accounts for the designated carrier, opt to apply the markup rule solely when the chosen carrier account (by account name) is utilized for the shipping charge.
USPS Zone
Utilize the USPS Zone setting to apply the Markup to postal zones that meet one of the following options (specifically for US domestic shipments):
- Greater Than (>) – the shipment’s destination zip code zone is numerically higher than the specified postal zone.
- Example: the Ship To zip code zone is 5 and the option’s value is set to 8. This markup rule will not be applied.
- Greater Than or Equal To (>=) – the shipment’s destination zip code zone is numerically higher than or the same as the specified postal zone.
- Example: the Ship To zip code zone is 5 and the option’s value is set to 5. This markup rule will be applied.
- Equal To (=) – the shipment’s destination zip code zone is the same as the specified postal zone.
- Example: the Ship To zip code zone is 9 and the option’s value is set to 9. This markup rule will be applied.
- Less Than or Equal To (<=) – the shipment’s destination zip code zone is numerically lower than or the same as the specified postal zone.
- Example: the Ship To zip code zone is 3 and the option’s value is set to 5. This markup rule will be applied.
- Less Than or Equal To (<=) – the shipment’s destination zip code is numerically lower than or the same as the specified postal zone.
- Example: the Ship To zip code is 6 and the option’s value is set to 5. This markup rule will not be applied.
Order Value
Use the following options to apply the markup or markdown if the monetary value of the order falls within the specified range:
- Minimum Order Value
Markup will only be applied if the value of the order is Greater Than (>) or Greater Than or Equal to (>=) a given USD amount. - Maximum Order Value
Markup will only be applied if the value of the order is Less Than (<) or Less Than or Equal to (<=) a given USD amount.
Order Weight
- Min Order Weight
Markup will only be applied if the shipping weight of the order is Greater Than (>) or Greater Than or Equal to (>=) a given number of pounds. - Max Order Weight
Markup will only be applied if the shipping weight of the order is Less Than (<) or Less Than or Equal to (<=) a given number of pounds.
Click when finished configuring or editing the markup rule
Copy Markups From Other Profiles
To significantly boost the efficiency of setting markups for a new or existing DesktopShipper shipping profile, utilize this functionality to seamlessly transfer all or selected advanced markup settings from the chosen profile to the current one.

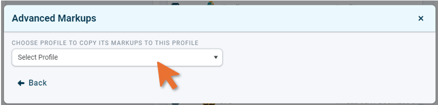
Select the Profile you wish to copy the markups from.
If the current profile has a duplicate markup, it will be hidden from the markup list.
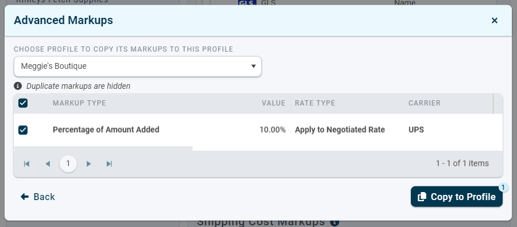
Once the desired markups are selected, click the ![]() button to copy and paste the markups into the current profile.
button to copy and paste the markups into the current profile.
CSV Import
An efficient way to streamline the markup settings is by importing a CSV file with one or more markup configurations for specific profiles. When the CSV is imported, only the profiles listed in the file will be impacted. This method simplifies the process of adding markups to multiple profiles simultaneously, eliminating the need to manually input markups for each profile individually.

Importing a new CSV will override any existing markups for the current profile.
Follow these steps for importing a CSV Markup file:
1) If you do not have an exported file you can create a CSV file using these steps:
-
- Download the template file by clicking
 . This CSV file contains all the headers needed in the import CSV file.
 - Open the temple file using Excel or Google Sheets
- Each row represents a markup tied to a specific profile identified by the profile’s ID number.
- When the CSV template is completed save the file as a CSV file
- Download the template file by clicking
Allowed Values for a Markup CSV File
-
The only allowed values for operator columns (headers ending in "_op") are:
Value Description > greater than >= greater than or equal to = equal to < less than <= less than or equal to -
The only allowed values for markup_type are:
-
Percentage of Amount Added
-
Flat Amount Added
-
Set Amount
-
Discounted Percentage of Amount Subtracted
-
Discounted Flat Amount Subtracted
-
-
The only allowed values for rate_type are:
-
Apply to Published Rate
-
Apply to Negotiated Rate
-
-
The only allowed values for usps_zone_value are:
-
0 - 9 (positive whole numbers only)
-
Click here to download an example markup CSV file
2) Click the [Select CSV File (Max 2 MB)] button or you can drag and drop the file from your file explorer window.
3) Once the markup CSV file is selected click the Import button
The maximum file size for the imported CSV file is 2 megabytes. Please split the file if your CSV is larger than the max requirements.
Important Markup Import Information
- Any profiles that are impacted will have their current markups replaced by the markups in the CSV file.
- Profiles impacted by the import will need to ensure that the Markup Type setting is updated to "Advanced" for the markups to take effect.
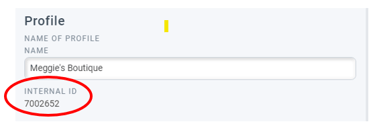
- Each profile is distinguished by its Internal ID number, which can be found in the profile settings located below the Profile’s name.
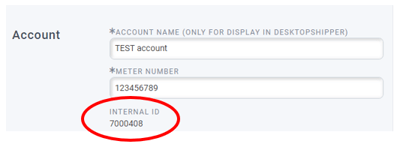
- The “carrier_account_id” field is an internal ID found on the specified carrier account settings page. displayed underneath the carrier account number.
- Empty rows are not allowed in the CSV file.
- If the file exceeds the maximum size limit, it is recommended to split the original file to ensure that all markups related to a profile are included in a single file. Importing multiple files with identical profile IDs will result in overriding any existing markups or previously added markups in the specified profile.
- The following fields must be populated in the CSV file:
- profile_id
- markup_type
- markup_value
- rate_type
- Each profile must have unique markup settings; duplication of markups is not permitted for the same profile.
- Value columns (_value) cannot be negative numbers.
- Value columns (_value) must not exceed 2 decimal places. The only exception is the “usps_zone_value” column.
-
- Examples:
- valid values: 2, 2.5, 1.23
- Invalid values: 1.234, 5.6945.
- Examples:
-
CSV Export
Utilize this functionality to create a CSV file containing all advanced markups for any profile within your DesktopShipper account that contains advanced markup settings.
Click to create the CSV file containing the exported markups.

Related Articles Regarding Profiles
-3.png?width=688&height=172&name=DS%20NEW%20Logo%20(LinkedIn%20Banners)-3.png)