Steps for setting up Profiles on App.shipwise.com
- Navigate to https://app.shipwise.com/
- Click on the "Settings" option in the main menu and select "Profiles".

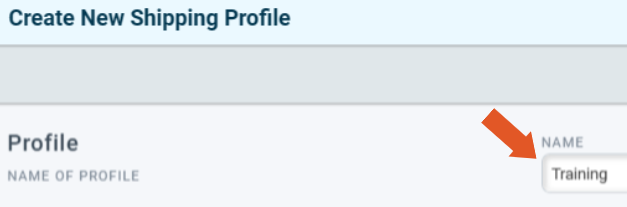
- Click "+New Profile".
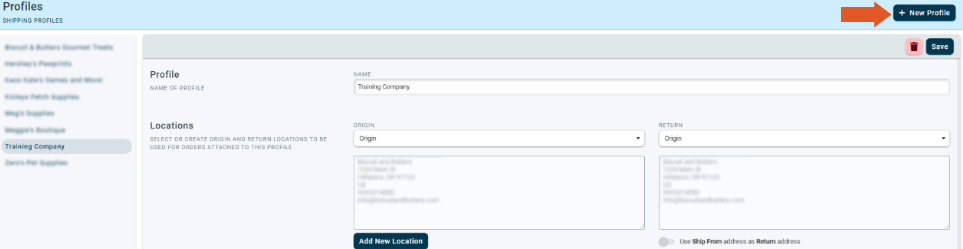
- Enter a unique name for the new Profile.
We will now review each required section of the profile that needs to be set up. A table of contents has been provided for quick access.
Table of Contents:
Locations
Select the locations you wish to assign to the profile from the drop-down.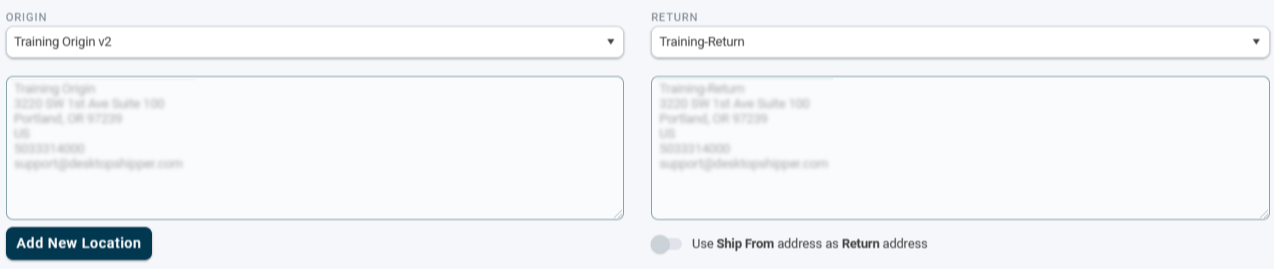
The Origin Address location is the address the orders will ship from.
The Return Address location is where the packages will be sent if they cannot be delivered.
When "Use Ship From Address as Return Address" is enabled, the return address will be pulled from the data received from the integration (host system).
When creating new Profiles or editing existing Profiles, you can create a new location.
- Click the button to open the Add Location window.
- Select one of the following location types
- Company
- Origin
- Return - Fill in all the fields that are needed.
- Click "Save Location" when finished.
Linked Integrations
The integration section of the profile controls which orders are attached to the profile.
You can have multiple integrations attached to one profile.
You can only attach an integration to one profile unless you further break down that profile using the Additional Profile Integration Filters.
- Select each integration needed for the new profile.

Note: Manual Orders and CSV Import will automatically be enabled whether the box is checked or not.
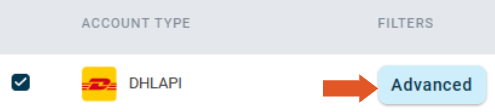
Duplicate Integrations
Enabling the same Integration on multiple profiles will cause confliction unless the "Advanced Settings" are utilized to specify values that will trigger the software to select an associated profile.
- Click the "Advanced" button that appears to the right of the conflicting Integration account name when the integration is enabled.

- Uncheck "Any" in the Additional Profile Integration Filters window.

- Click "Add" to enter an option that will differentiate the integration from another profile's same Integration.
-Secondary Market
-Department
-Warehouse Location
Carrier Accounts
The Carrier Accounts section of the profile is critical. If an account is not enabled on the profile, you will be unable to obtain any rates for any carrier service.
This section is heavily utilized by fulfillment warehouses who often have different accounts per client that they use to ship.
- Select each carrier account needed for the new Profile.
Each carrier account for the profile has two settings:
- Can Return
Allows the enabled carrier account to be able to produce return labels (if the carrier supports return labels). - Can Ship
Allows the enabled carrier account to be able to produce postage labels for that selected carrier. This setting is enabled by default.
Carrier Account Filtering
You can use the Carrier Account filters to enable specific services for the associated profile.
For example, you can filter the FedEx services (such as F11 FedEx 2 Day) so that orders assigned to the profile will only rate for the FedEx 2 Day service. If you attempt to rate for another FedEx service, you will get an error until it's added to the filter list.
- Click on the "Advanced" button to the right of the carrier account number to open the Filter Services window.
- Select the profile you want to attach the filter to, and service to be filtered.
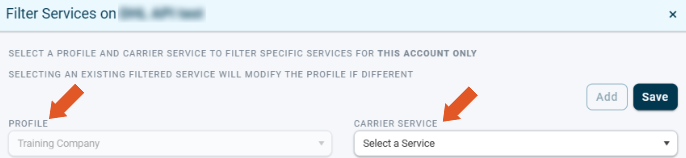
- Click "Add".
After including more services to filter if needed, click "Save".
*Required fields are filled out on the profile and you need to save to continue.
See a video tutorial below:
![]()