
This article contains information for all of the Users settings on the Users page.
The Users settings page UI:
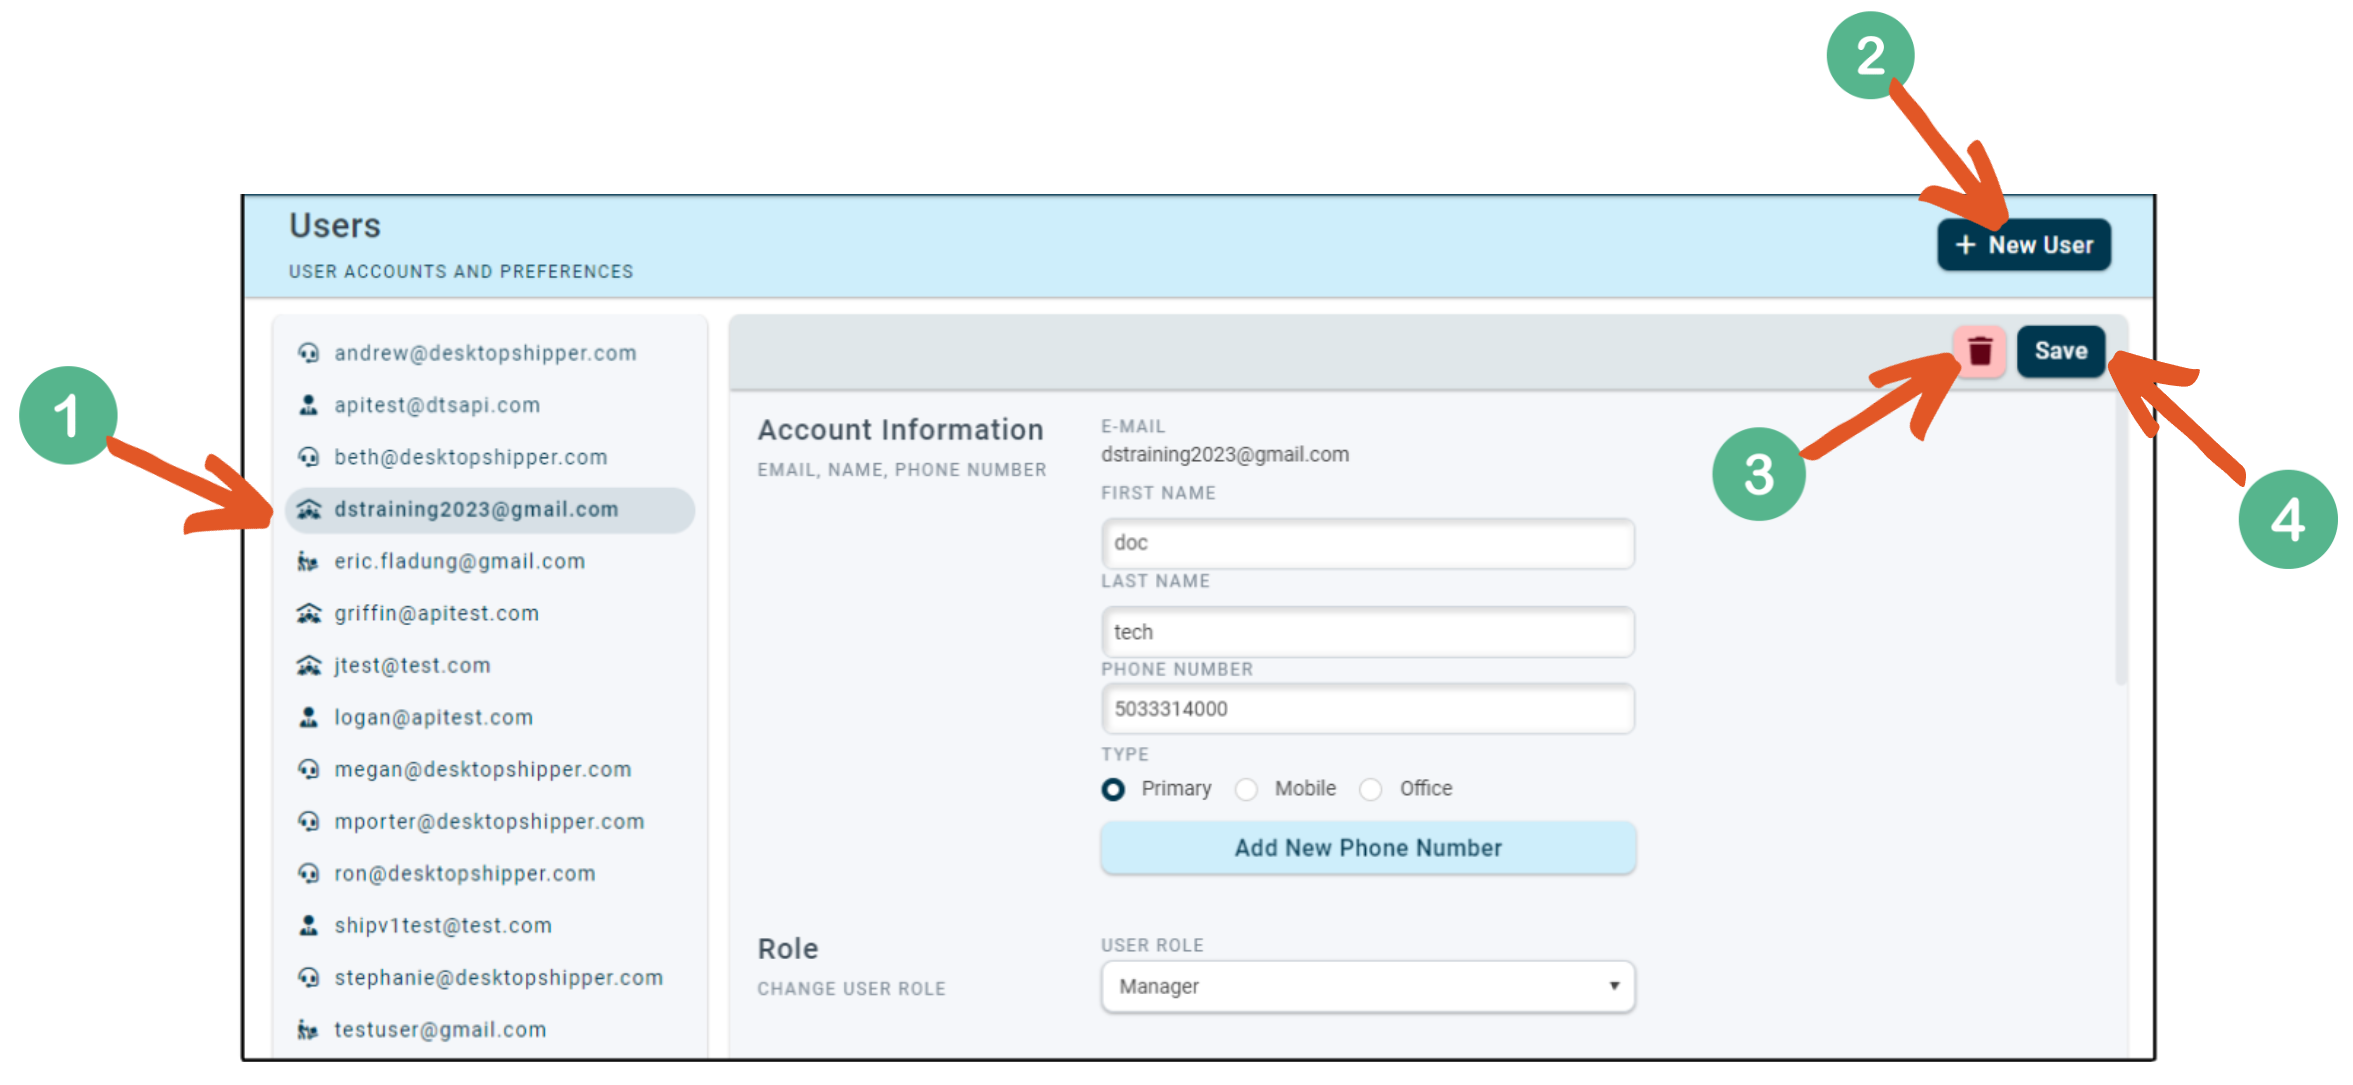
1) Select the User you need to modify.
2) Click ![]() to add a user to the list.
to add a user to the list.
3) Click  to delete the selected user.
Note: Only an internal DesktopShipper Admin user can delete a customer Admin user. The customer will need to contact DesktopShipper support.
4) Click ![]() to record any changes to the user settings.
to record any changes to the user settings.
The User Settings:
Account Information
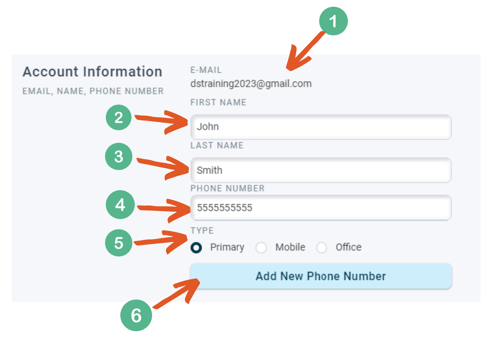
1) The Username - also the user's email address.
The user's email address cannot be modified. To change the user's email address you will need to delete the user and add him/her again using the new email address.
2) The user's First Name.
3) The user's Last Name.
4) The user's Phone Number.
5) The user's Phone Number Type.
6) If needed, click here to add additional phone numbers for the user.
Role
The Role section allows an Admin user to change the level of the selected user.
User Role Definitions -
*From least to greatest, each successive role assumes the previous role's permissions.
|
Role |
Permissions |
|
Viewer |
Access: - View orders and shipments Restrictions: - Cannot edit or ship orders |
| Shipper | Access: - Can view, edit, and ship orders Restrictions: - Cannot update settings - Cannot bulk update orders - Cannot bulk void shipments |
| Manager | Access: - Can view, edit, and ship orders - Can bulk update orders - Can bulk void shipments - Can update carrier and integration settings Restrictions: - Does not have access to update user permissions |
| Admin |
Access: |
Devices
The devices section lets you set some printer and scale preferences. These settings are optional and can be set at any time. These settings can be changed in the Workstation Settings as well.
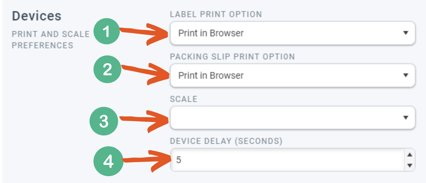
Printer Settings:
1) Select which printing scenario for postage labels:
- Print in Browser - Desktopshipper will generate a postage label and send it to your browser. From the browser, you can print it or save it as a PDF.
- Print Later - the software will not print until you go back later and print the label manually from the DS UI.
- Send to Printer - prints the label directly to the printer.
2) Select which printing scenario for packing slip labels:
- Print in Browser - Desktopshipper will generate a postage label and send it to your browser. From the browser, you can print it or save it as a PDF.
- Print Later - the software will not print until you go back later and print the label manually from the DS UI.
- Send to Printer - prints the label directly to the printer.
NOTE: To send a label directly to a printer, the DesktopShpper Print Utility app must be installed and running and the label printer must be set up in the app.
How to Set Up the Print Utility
Please contact DesktopShipper’s support team for assistance if needed.
Scale Settings:
3) Select which scale to use (optional).
4) Set a scale delay in seconds (if a slight pause is required reading your scale). (optional)
NOTE: you will need to set up a USB scale using the DS Cloud Print Utility app to select a scale. Please contact DesktopShipper’s support team for assistance if needed.
How to Set Up the Print Utility
Please contact DesktopShipper’s support team for assistance if needed.
Batch Settings
The Batch Settings section provides a group of preferences for shipping with batches
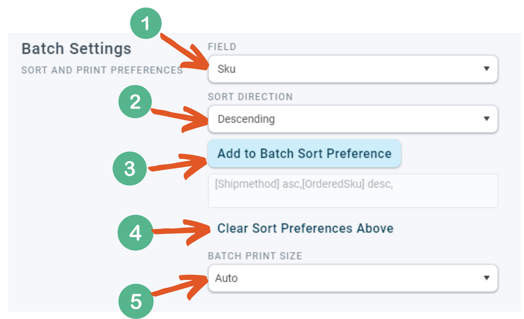
The first set of preferences tells DesktopShipper how you want the batch labels to print. These settings can provide a more organized way of picking the items from the warehouse shelves. You can add as many fields as you need.
1) Select the data field to sort the labels by. The choices are:
-
Ship Method
-
Sku
-
Total Units
-
Market
-
Department
-
Weight
- Order Id
- Market Id
- Reference Id
- Line item Count
- Item Location
2) Set the sorting direction the labels will print out. The options are:
- Ascending
- ie. A to Z or starting at the lowest number
- Descending
- Ie. Z to A or starting at the highest number
3) Click ![]() to add the conditions to the list.
to add the conditions to the list.
4) Click ![]() to remove all the added conditions
to remove all the added conditions
NOTE: You cannot remove individual conditions. Only all of them.
5) Finally, select the sizes of the batch labels:
- Auto
- 4x6 inches
- 8.5 x 11 inches
- 4x6 multiplex labels
- 4x4 multiplex labels
User Preferences
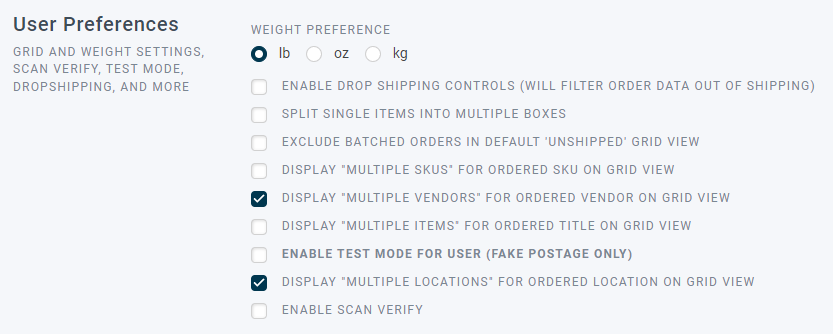
1) The last section of the Create New User window is the User Preferences.
- Select the weight type: Pounds (lb), Ounces (OZ( or Kilograms (Kg)
- Enable drop shipping controls – This setting will enable our drop shipping controls feature for managing dropped orders.
- Spilt single items into multiple boxes – this setting is for allowing the system to split up a single line item that contains a quantity of more than one into multiple packages. Ie. A line item contains a quantity of 100 and there are too many of these items to fit in a single box.
- Exclude batched orders in default “unshipped” grid view – enable if you do not want orders that belong to a batch to show up in the orders grid on the Orders page.
- Display “Multiple Skus” for ordered Sku on Grid view – if the Sku column is enabled on the Orders page, DesktopShipper will display “Multiple” if there are more than one product in the order. Otherwise, the column will display the first Sku on the item list.
- Display “Multiple Vendors” for ordered Vendor on Grid view – if the “Vendor” column is enabled on the Orders page and an order contains items from multiple vendors, the column will display “Multiple”. This option is useful for fulfillment companies that often ship orders in this situation. Otherwise, the column will display the first vendor on the item list.
- Display “Multiple Items” for ordered Title on Grid view – if the “Title” column is enabled on the Orders page and an order contains more than one item of different Skus, the column will display “Multiple”. Otherwise, the column will display the first product title on the item list.
- Enable test mode for user – sets all carrier postage labels to test mode which prevents the carriers from either charging or billing the shipper for postage fees.
- Display “Multiple Locations” for ordered Location on Grid view – if the “Location” column is enabled on the Orders page and an order contains more than one item located in separate locations in the warehouse the column will display “Multiple”. Otherwise, the column will display the first product title on the item list.
- Enable Scan Verify – this option enables DesktopShipper’s Scan Verify feature which aids the shipper in preventing shipping mistakes such as missing an item from the box or shipping the wrong quantity of items or shipping the wrong item.
-3.png?width=688&height=172&name=DS%20NEW%20Logo%20(LinkedIn%20Banners)-3.png)