
Below are instructions on how to set up a new UPS account with discounted rates in DesktopShipper.
Getting Started
If you do not already have a UPS username and password, navigate to the UPS.com login page and create one.
Note: A UPS.com username and password will be needed to finalize UPS account setup in DesktopShipper.
Account Setup
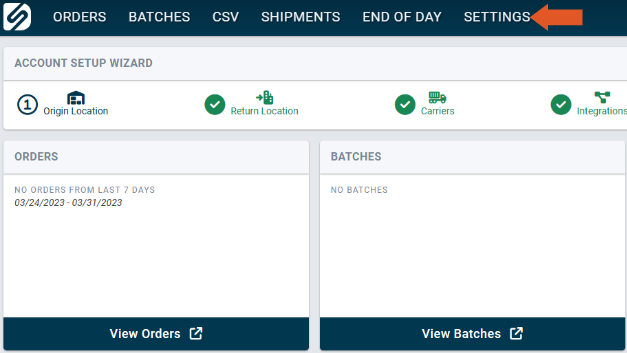
- Navigate to shipv2.desktopshipper.com.
- Login with your DesktopShipper username and password.
- Select "Settings" across the top of the home dashboard.
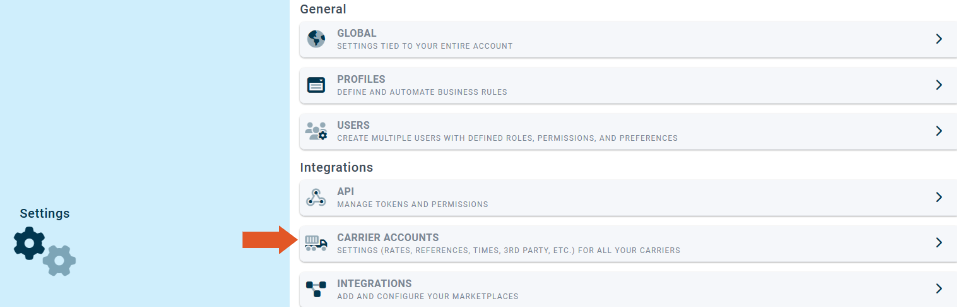
- Click "Carrier Accounts".
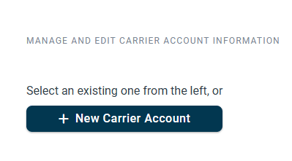
- Click "+ New Carrier Account".
- Select UPS from the list.
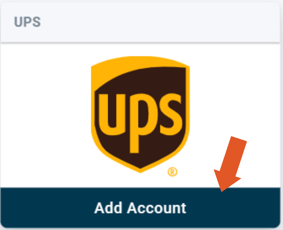
- Click "Create New UPS Account".
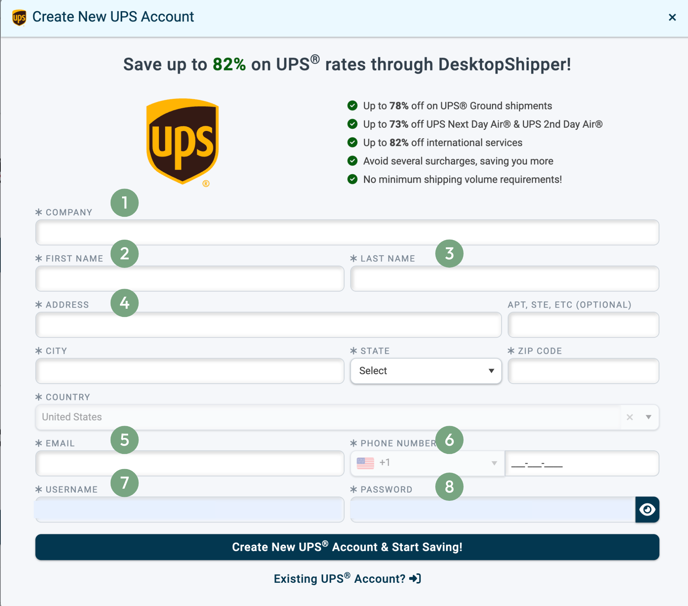
- Enter your new company name.
- Enter the first name associated with the new UPS account.
- Enter the last name associated with the new UPS account.
- Enter the required address information, including main address line, city, state, and zip code.
- Enter the Email associated with the new UPS account.
- Enter the phone number associated with the UPS account and select your location from the drop-down.
- Create your new UPS account Username.
- Create a new UPS account Password.
Passwords cannot contain your first or last name, UPS username, or email address used to log in to UPS.com.
Password Requirements:
12-26 Characters long
One special Charachter
Upper and lower case
One Number - Select the Create New UPS Account & Start Saving! Button.
After clicking the "Create New UPS Account & Start Saving!" button, you will be redirected to the UPS login page. At this point, you can enter the new email or username and password that is associated with the account you signed up with in the previous step.
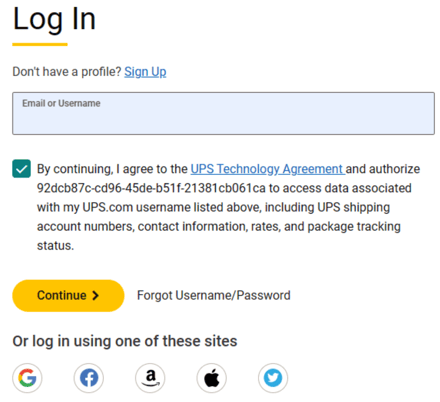
- Agree to the terms and conditions, then enter your password and log in.
You will then be directed back to DesktopShipper to complete the setup process.
Section 1: Account
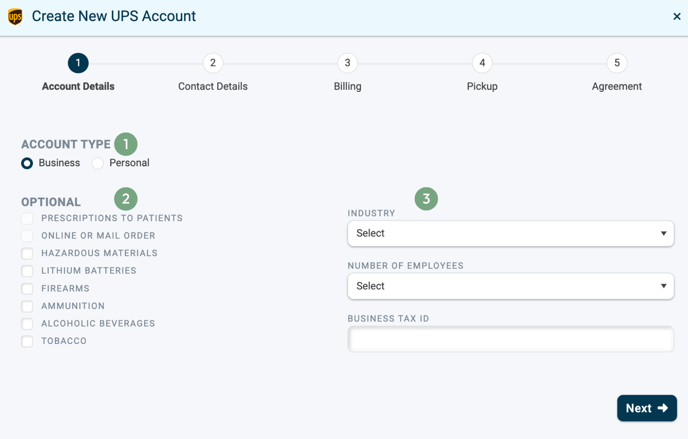
1. Select the account type from the drop-down.
2. If desired, check off any of the following product types that you will be shipping. Prescription to patients, online or mail order, hazardous materials (dangerous goods), lithium batteries, firearms, ammunition, alcoholic beverages, or tobacco.
3. If desired, select an industry type and number of employees from the drop-down menus. You may also enter a Tax ID (TIN) to be associated with the UPS account.
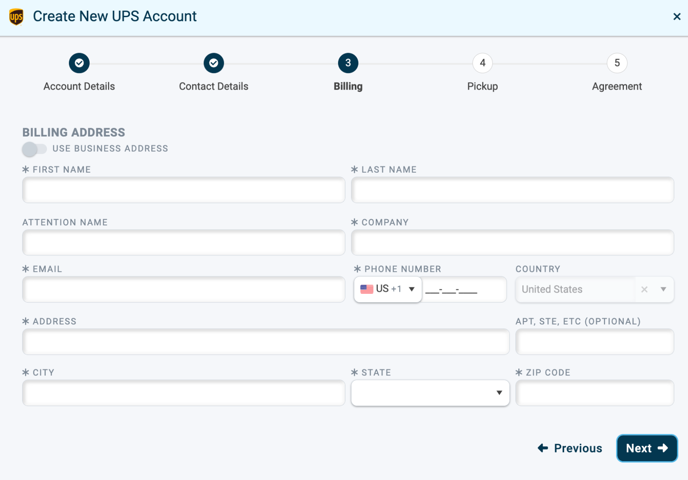
Section 2: Billing
In this section, enter the required billing information to be associated with the UPS account. This will include name, company name, phone number, Email, and the billing address.
Step 3: Pickup
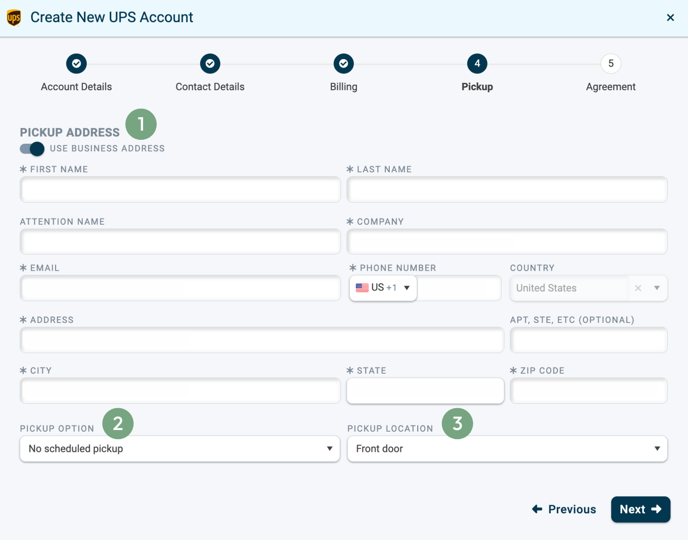
1. Enter the Pickup information. This includes the name, pickup address information, and company name.
2. Select a pickup option from the drop-down. Example option: Daily Pickup. Certain selections will allow you to choose preferred times for pickup.
3. Select a pickup location from the drop-down. This will tell the carrier where to bring the packages in at the location.
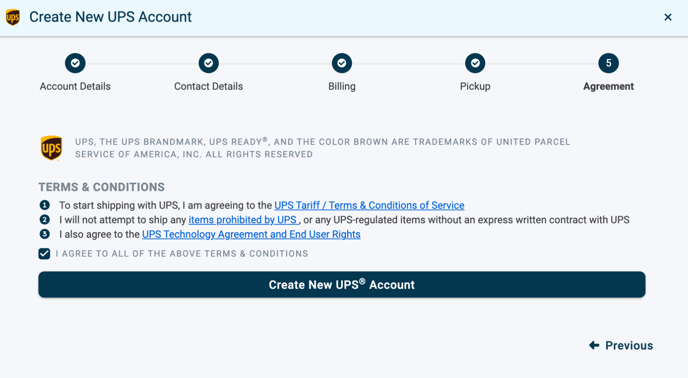
Step 4: Agreement
Agree to the Terms and Conditions and click "Create New UPS Account".
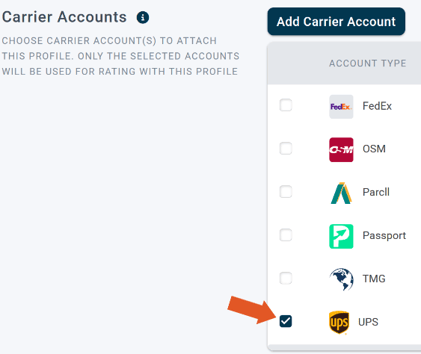
Finally, the carrier account will need to be enabled on the profile being used to ship UPS before the account can be used to rate orders.
- Select Settings across the top.
- Select "Profiles" from the list settings. For more information, including example images on how to set up the "Carrier Accounts" section of a profile, see the following link.
- Select the profile from the left-hand side.
- Scroll down to "Carrier Accounts" and check off UPS.
- Remember to save.
-3.png?width=688&height=172&name=DS%20NEW%20Logo%20(LinkedIn%20Banners)-3.png)