
Below are instructions on how to set up an existing UPS account in DesktopShippr.
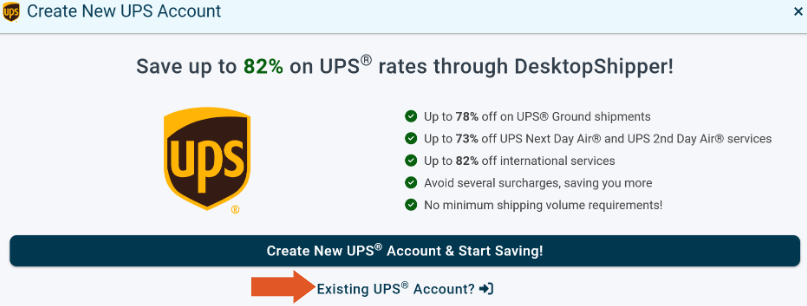
Note: While you have the ability to connect an existing UPS account, you may also sign up for a new UPS account through DesktopShipper and receive up to 82% off rates. See more here (overview KB link).
*You will need a UPS invoice for the account that is less than 90 days old in order to complete setup.
If you have not yet received a commercial invoice for your account, reach out to UPS and request that a generic one be generated. Contact UPS
Setting Up an Existing UPS Account
- Navigate to shipv2.desktopshipper.com.
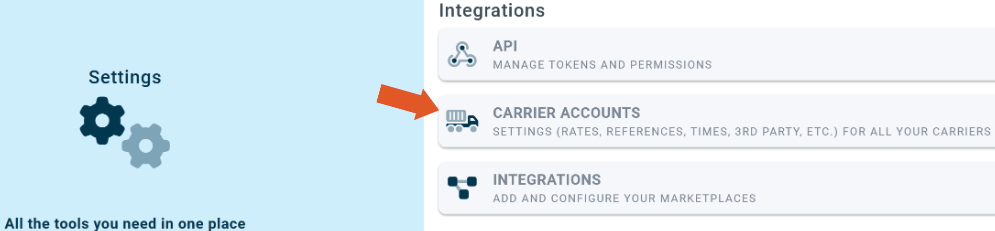
- Click "Settings" across the top.
- Select "Carrier Accounts".
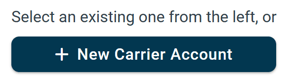
- Click "+ New Carrier Account".
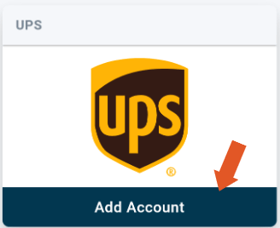
- Click the "Add Account" button on UPS.
- In the pop-up window, select "Existing UPS Account".
Fill in the required information in the UPS account set up window.
Section: MyUPS Profile Information
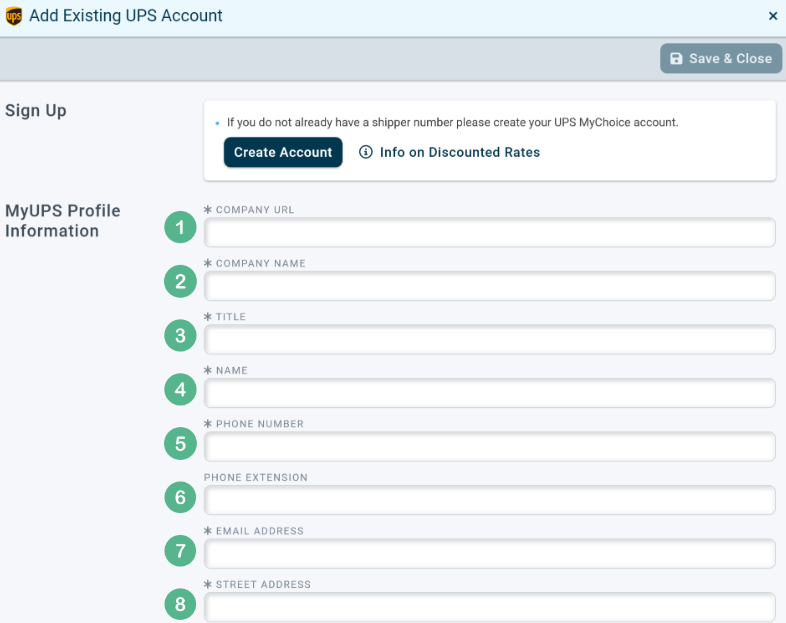
1. Your company's website URL. If you do not have a company website, you may enter an arbitrary value.
2. Your company name.
3. Title refers to the title of the person who is the name on the UPS acocunt.
4. The name on the UPS account.
5. The phone number on the UPS account.
6. (Optional) Enter an ext. number if applicable.
7. Email address associated with the UPS acocunt.
8. The address associated with the UPS account.
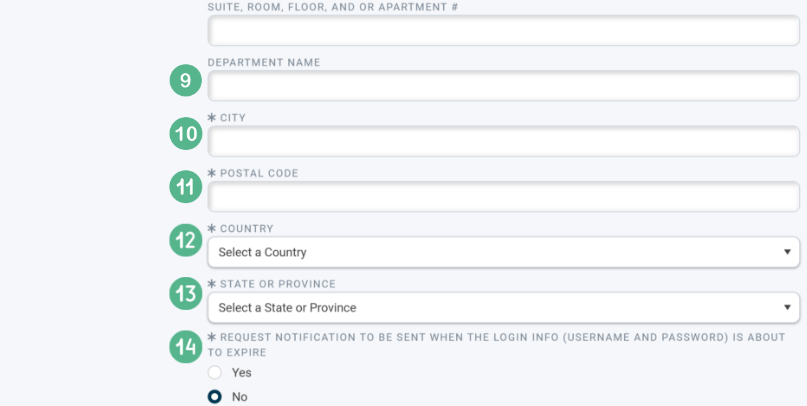
9. (Optional) Give the account a department name as needed to suit business needs.
10. The city associated with the address on the UPS account.
11. The postal code associated with the address on the UPS account.
12. The country name associated with the address on the UPS account.
13. State or province associated with the address on the UPS account.
14. It is required to select whether or not to enable automatic Email notifications for a login expiration notice.
Section: UPS Account Information
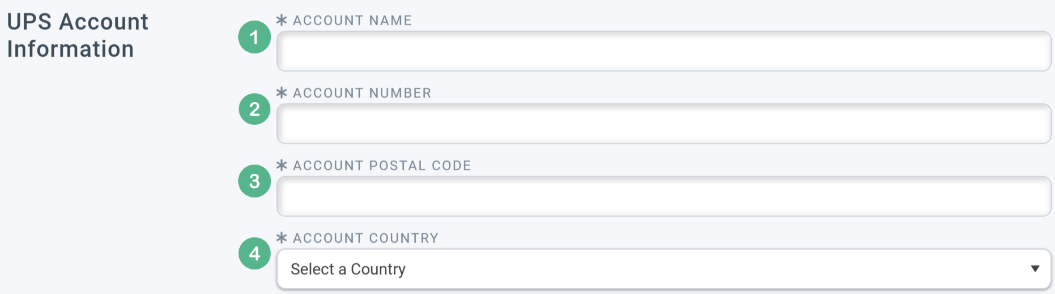
1. The UPS account name.
2. The UPS account number, this can be found on the commercial invoice.
3. The zip code associated with the UPS account.
4. Select the country associated with UPS account.
Section: UPS Invoice Information
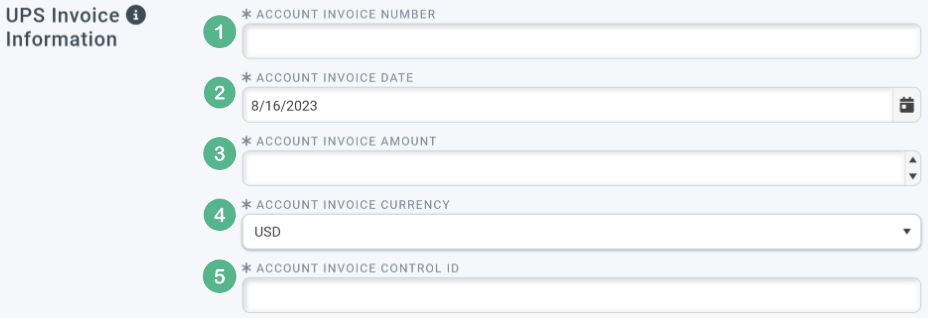
Using the commercial invoice newer than 90 days, fill in the following:
1. The invoice number.
2. The date the invoice was issued.
3. The amount listed on the invoice.
4. The currency the amount is in. Options are: US Dollar (USD) or Canadian Dollar (CAD).
5. The invoice control ID listed on the commercial invoice.
Remember to click "Save and Close" when finished.
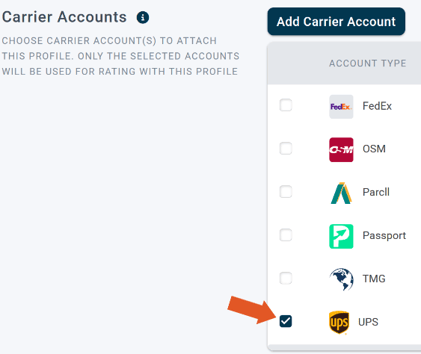
Finally, the carrier account will need to be enabled on the profile being used to ship UPS before the account can be used to rate orders.
- Select Settings across the top.
- Select "Profiles" from the list settings. For more information, including example images on how to set up the "Carrier Accounts" section of a profile, see the following link.
- Scroll down to "Carrier Accounts" and check off UPS.
- Remember to save.
-3.png?width=688&height=172&name=DS%20NEW%20Logo%20(LinkedIn%20Banners)-3.png)