
This article covers CSV exports from the CSV page on the ShipV2 server
CSV Exports allow customers to get vital information like tracking, back from their imported files.
CSV exporting allows you to select an import, edit the columns you need to be exported by adding and/or removing headers.
Additionally, you may change the DesktopShipper field mappings to the headers in the exported file.
To perform a CSV export:
- Select which mapping the desired CSV import used when it was imported.
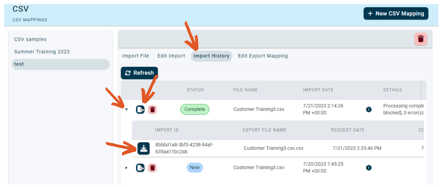
- Navigate to the "Import History" tab.
- On the row for the CSV import you wish to export, click the
 button to start the export.
 - Once DesktopShipper has completed the export, click the
 icon for the CSV import row to reveal a list of exported files. If export files were already generated, the latest export will be at the top of the list.
 - Click the
 button to save the exported CSV file to your "Downloads" folder.
To edit a CSV Export mapping:
- Select which mapping the desired CSV import used when it was imported.
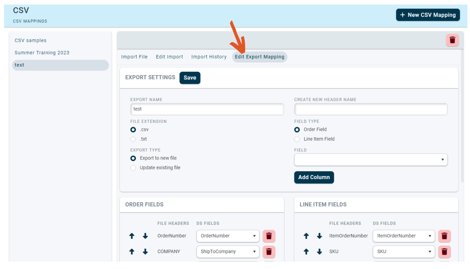
- Navigate to the "Edit Export Mapping" tab.
- Enter or change the name of the CSV export file.
- Select whether you want a CSV or text file extension.
- Select whether you want to export the data to a new file or update and/or append the shipment data to an existing file.
On the left side of the page are options for adding a new field for the export file. - Enter a name for the new header.
- Select if the header is for the order data or line-item data.
- Choose which DesktopShipper field the header will be mapped to.
- Click
 to append the new header.
 - Below the above-mentioned options are the current field mappings.
- You can rearrange the position of the headers by using the up
 and down
 arrows
 - Remove a header by clicking the trash can icon

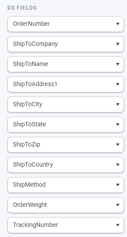
- Change the DesktopShipper fields that the file header will be mapped to for either Order data or Line Item Data by using the drop-down options under the "DS FIELDS" section.
- Click
 when done
-3.png?width=688&height=172&name=DS%20NEW%20Logo%20(LinkedIn%20Banners)-3.png)