- Documentation
- How to
Split Single Line Items into Multiple Packages in the Cloud
How-To Split Single Line Items into Multiple Packages in the Cloud
Purpose:
This article will show the steps needed for customers to enable and use the DTS setting that allows a single line item to ship in multiple packages.
Requirements:
- Admin user logged in- must be able to adjust User Settings
- User logged in after giving them access to "Split single items" function
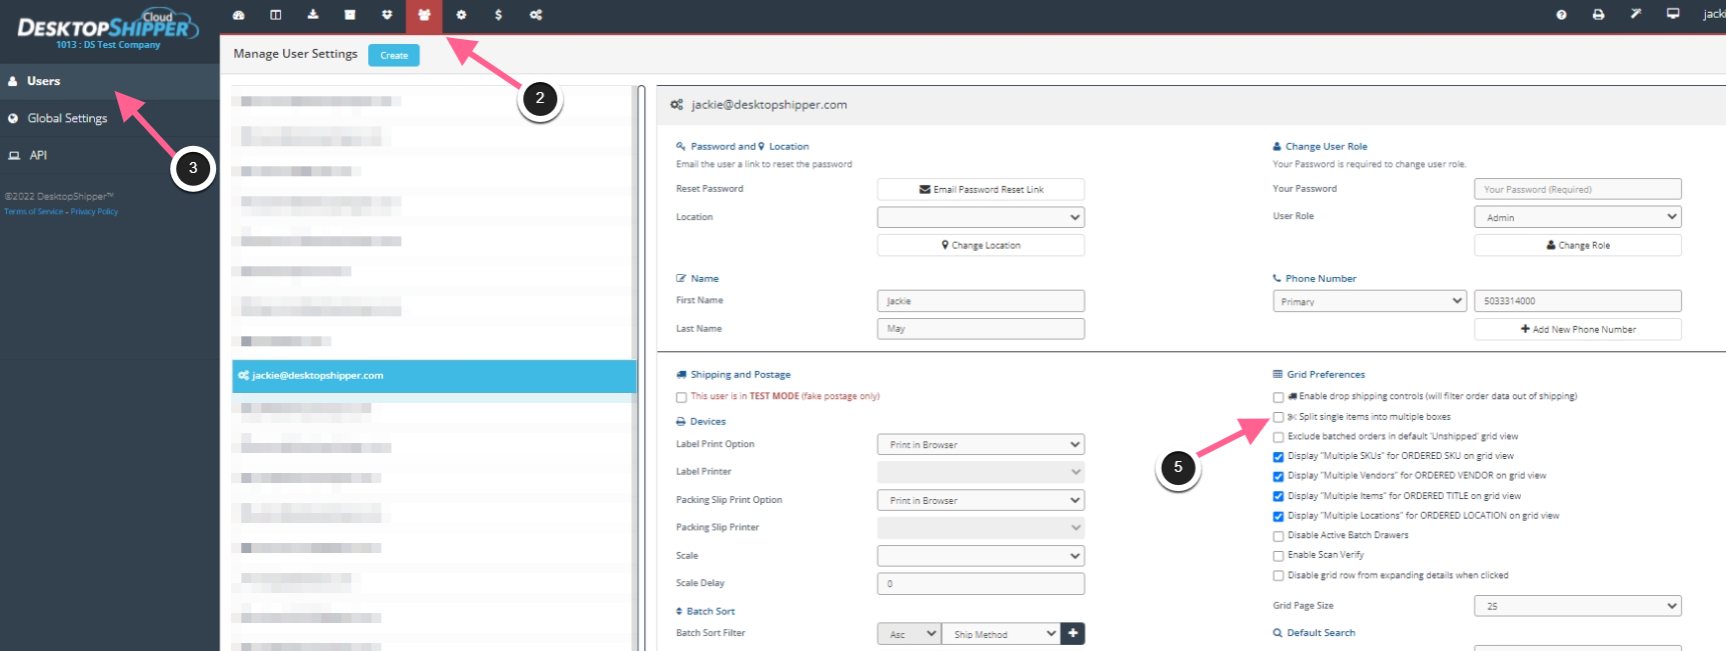
Giving users access to "Split single items" function:
- With an Admin user account, log into ship.desktopshipper.com
- Navigate to the "Manage Your Users" tab
- Open the "Users" drawer along the left
- Select the user who needs to use the function
- Check the box next to "Split single items into multiple boxes" under Grid Preferences
- Click "Save" in the upper right corner to save the settings
Using the "Split single items" function:
- Log into ship.desktopshipper.com
- Locate the order that has the single item that needs to be split and shipped
- For this example, I've created a manual order
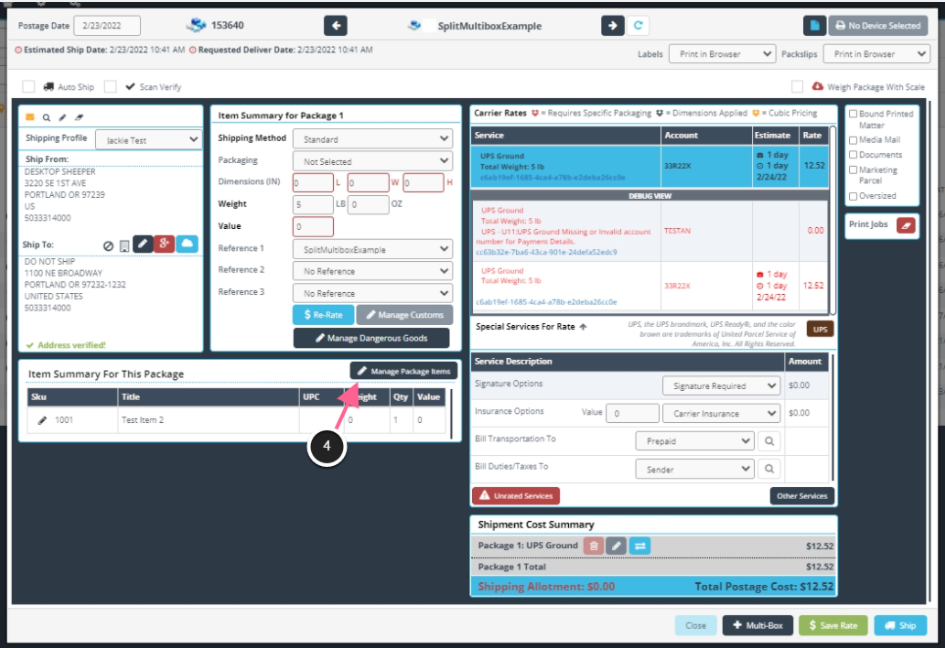
- Click the truck icon to open the ship screen

- From the shipping screen, click "Manage Package Items"
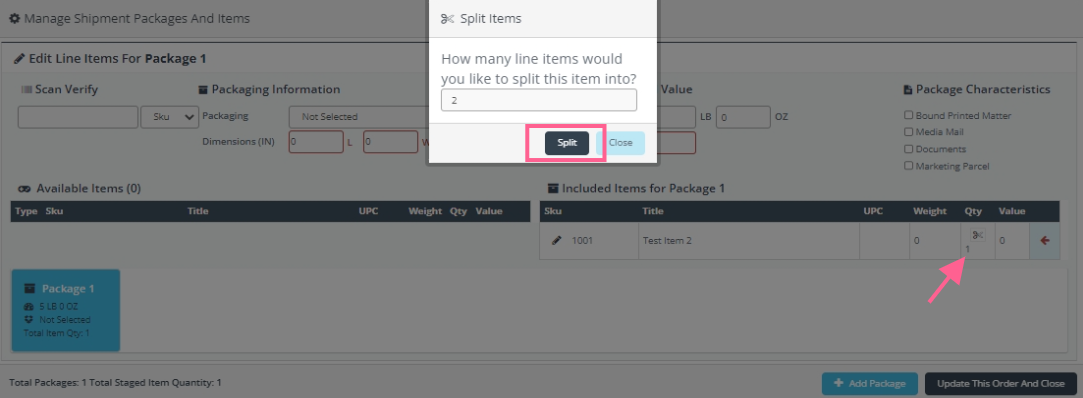
- Click the small scissor icon under the Qty column, enter the number of packages needed, and click Split
- For this example I chose 2
- For this example I chose 2
- Click the blue +Add Package button and move the remaining item into the package by clicking the arrow next to the item.
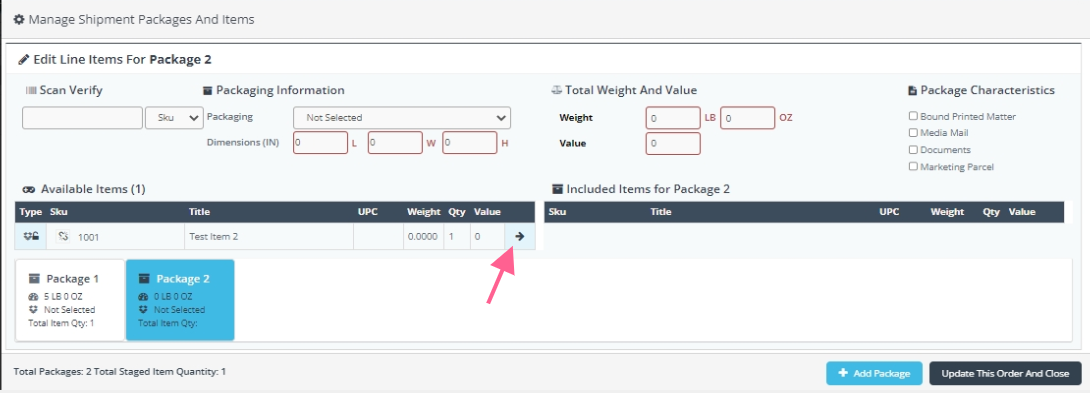
- Lastly, click the Update This Oder And Close button in the bottom right corner.
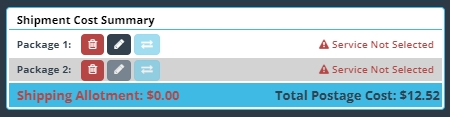
- You will now see the number of packages you created under the Shipment Cost Summary.
- Note- you will need to click each package and select the service for each package.