This document provides an overview on setting up the Print and Scale Utility Application in ShipWise.
What is the Print and Scale Utility App?
The Print and Scale Utility App is an application that allows customers to connect label/ packslip printers and scales, directly to ShipWise.
When an order is processed, the labels (and packslips if applicable) can be sent directly to the connected printer.
Furthermore, customers can pull package weights directly into orders on ShipWise using a scale that is connected to the app.
Downloading the Print and Scale utility App: Part 1
- Navigate to ShipWise Web App.desktophipper.com in the web browser.
- From the home dashboard, click "Download" under Print and Scale Utility.
*There are additional setup instructions present in this section.
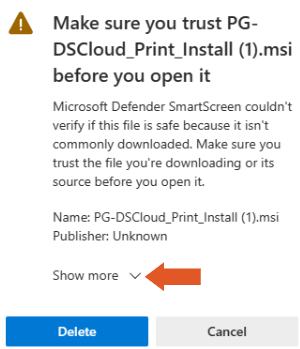
- In the download window, click the three little dots and select "Keep".

- Click "Show more".
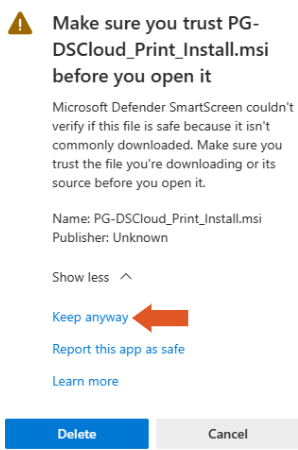
- Select "Keep Anyway".
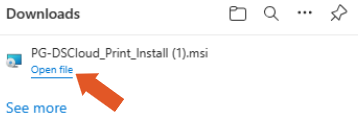
- Then, open the file.
Downloading the Print and Scale Utility App: Part 2
- Within the downloader, click "Next."

- Select the folder you want to install in the Print Utility App in, and then click "Next".
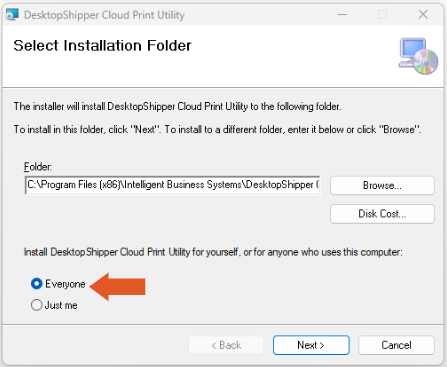
Note: Selecting "Just me" will cause the Print and Scale Utility App to only be available for the user that is currently logged into Windows. It is recommended to select 'Everyone" so that any user logged into the workstation can utilize the app.
- Click "Next".
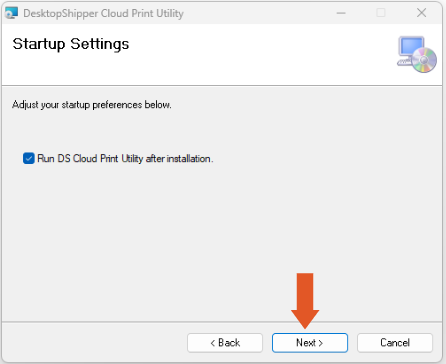
- After, you will need to click "Next" one more time, and then "Close."
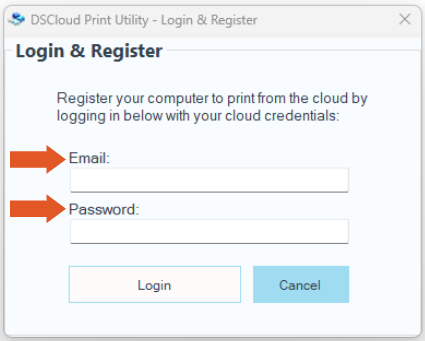
You will then be prompted to enter your ShipWise username and password to finalize the download.
Setting Up the Print and Scale Utility App
After completing the download process, you now have access to the Pint and Scale Utility App.

- Click "+ Add Device" then select an available printer from the drop down.

- Next, give the printer a unique name (This will make it easier to locate later on), and ensure the print size is set to "4x6".
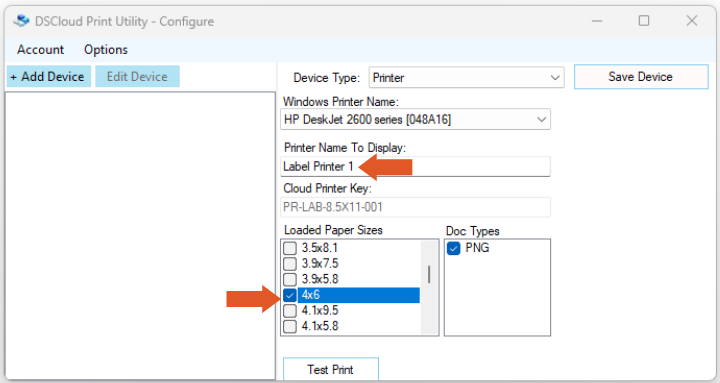
Note: If you have a Zebra Printer and/or your label printer supports ZPL code (Rather than PNG) then you can check the ZPL box in the printer configuration screen. The ZPL option will be available in the "Doc Types".
- Select "Test Print" to ensure the connection between the app and the printer is working accordingly.
- Click "Save Device" in the upper right-hand corner when finished.
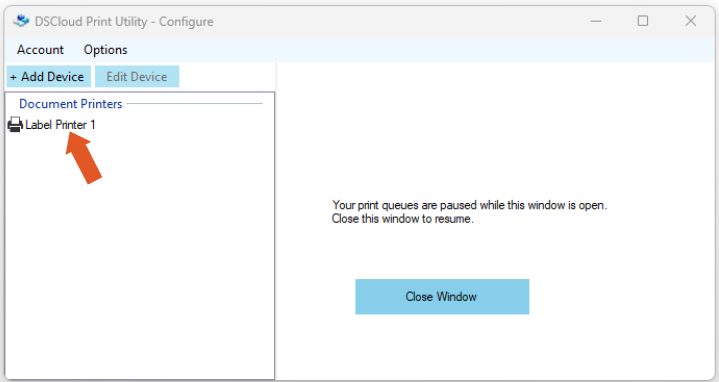
The new device will now be listed on the left-hand side of the application.
- Finally, navigate back to https://app.shipwise.com/.
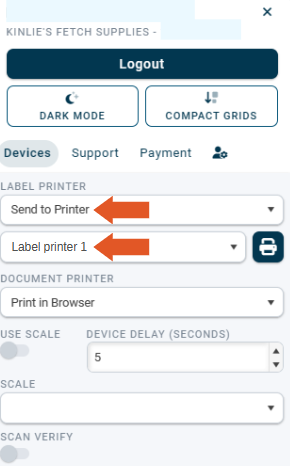
- From the home dashboard, select the account icon in the upper right-hand corner next to the account name and client ID.

- Under label printer section, select "Send to Printer" and select the printer that was just set up.
*Repeat these steps to add a Scale if desired.
![]()