
This document covers everything you need to know about setting up a Pitney Bowes Cross Border account.
Requirements for Setting Up a PB Cross Border Account in DesktopShipper
PB Account
Customer needs to have obtained a Pitney Bowes merchant account prior to adding a new CBDS account to the cloud. Customer can sign up for a PB account during set up.
Account Info
You will need to know the account number, Shipper ID, Client ID, Consolidation Center, and the Client Facility ID (optional), which you can obtain from your Pitney Bowes rep.
Setting Up a Pitney Bowes Cross Border Account
- Navigate to shipV2.destopshipper.com and login with your DesktopShipper username and password.
- Navigate to Carrier account settings and click + New Carrier Account.
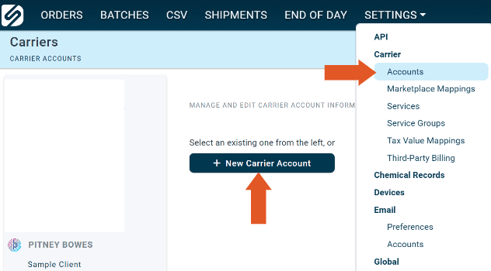
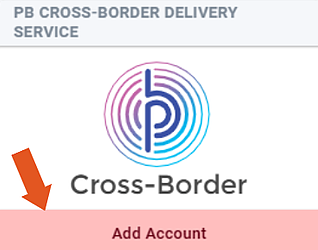
- Select PB Cross Border Delivery Service from the list.
Note: Pb Cross Border accounts require assistance from our Implementation team to finalize setup.
- Enter the required account information.
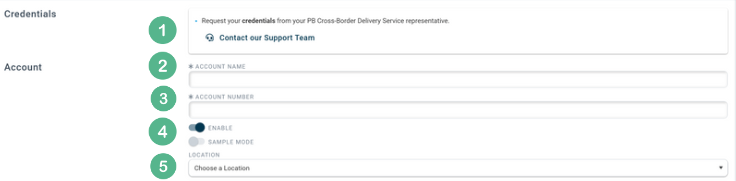
1. Request your creds from your PB rep.
2. Enter an account name unique from other PB Cross Border accounts.
3. Enter your PB Cross Border account number.
4. Enable the account by toggling to the right.
5. Select a location from where the shipments using this PBCB account will be sent from.
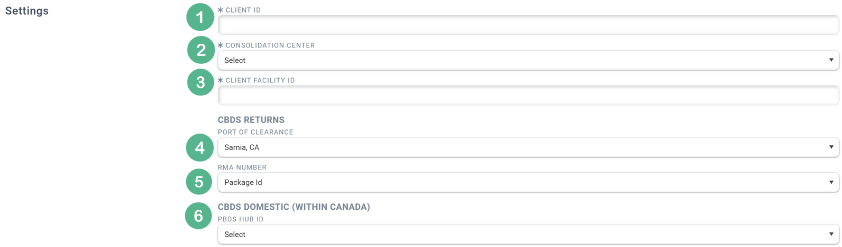
1. DesktopShipper client ID.
2. Facility where parcels are received and grouped together based on destination for outbound shipping. Potential options are Hebron KY, Carol Stream IL, Commerce CA, Sparks NV, Grapevine TX, San Francisco CA, Kent WA, Greenwood IN, West Valley City UT, Monroe Township NJ, Bloomington CA, Atlanta GA, Odenton, MD, Orlando FL, Stockton CA, Erlander KY, Chicago IL.
3. Enter the client facility ID provided by PB.
4. Specifies the port where packages clear customs.
5. Optional Return Merchant Authorization number used for PB reporting.
6. Specifies the hub that receives the CBDS packages within Canada.
-3.png?width=688&height=172&name=DS%20NEW%20Logo%20(LinkedIn%20Banners)-3.png)