
This article covers setting up a CSV mapping, required for importing CSV files.
What is a CSV Mapping?
A CSV mapping is a feature that informs DesktopShipper where to store the data imported from a CSV file. The mapping directs the software to match a DesktopShipper data field to a specific header in a CSV file.
Why is a CSV Mapping needed?
In order to sync DesktopShipper fields to a CSV's headers, a CSV mapping will need to be created. DesktopShipper cannot import a CSV without a mapping. You can create a new mapping or use an existing mapping.
For example, if the order ID field header in the CSV is named "packageID" it will need to be mapped to "OrderId" so that the values in the "packageID" field will be stored in the "OrderID" field.
The below CSV field headers are required for importing a CSV file, however, can be set to a different header name in the CSV file as long as it is mapped to the required corresponding DesktopShipper field.
Required Order Level Fields:
| OrderNumber | ShipToAddress1 | ShipToCity |
| ShipToState | ShipToZip | ShipToCountry |
| ShipMethod | ShipToName |
Notes:
The "OrderNumber" field values need to be incremented unless the preceding row(s) are duplicated because the order contains multiple items. See below.
If you are importing orders with multiple items, only one item can appear per line of data. You will need to duplicate the first line and add an additional line per item.
- Make sure to change the duplicated item data to reflect the other item(s)' data.
- The additional lines must be the same order Id as the original line. Desktopshipper will combine these lines into one order when imported if the order ID(s) are matching.
Required Item Level Fields:
| ItemOrderNumber | SKU | QTY |
| Description | Value |
Note: When mapping a CSV file, you will notice that each of the dropdown selectors for the corresponding fields contains a "default" option. You can use this option to populate the field with a value that all orders will use for that field. Therefore, although a field is required, you can use the "default" option and leave out the header from the CSV.
For example, often the "default" option is used for "ShipToCountry" and set to "United States" if all the orders in the CSV file are domestic.
Note: The "ItemOrderNumber" field defaults to the OrderId field.
The below CSV field headers are required under certain conditions for importing a CSV file, however, can be set to a different header name in the CSV file as long as it is mapped to the corresponding DesktopShipper field.
Conditional Order Level Fields
| Field | Conditions |
| ShipToCompany | Either ShipToCompany or ShipToName must have information |
| ShipToName | Either ShipToCompany or ShipToName must have information |
| ShipToPhone | Some Carrier/Countries may be required |
| ShipToEmail | Some Carrier/Countries may be required |
| OrderWeight |
Needed if no Item weight is not provided or no scale is used during processing |
Conditional Line Item Level Fields
| Field | Conditions |
| HSCODE | Required for International & APO/FPO/DPO |
| CountryOfMfg | Required for International & APO/FPO/DPO |
| ItemWeight | Required for International & APO/FPO/DPO |
The below CSV field headers are optional and can be set to a different header name in the CSV file as long as it is mapped to the corresponding DesktopShipper field.
Optional Order Level Fields
| Reference1 | OrderWeightUnits | BillToState | FromCity |
| Reference1 | BillToCompany | BillToZip | FromState |
| Department | BillToName | BillToCountry | FromZip |
| MarketPlace | BillToAddress1 | BillToPhone | FromCountry |
| ShipToAddress2 | BillToAddress2 | BuyerEmail | FromPhone |
| ShipToAddress3 | BillToAddress3 | FromCompany | FromEmail |
| ReturnService | BillToCity | FromAddress | OrderDate |
Optional Line Item Level Fields
| GiftMessage | ISBN | Category |
| UPC | EAN | Barcode |
| Length | ASIN | CustomVal1 |
| Width | Title | CustomVal2 |
| Height | Brand | CustomVal3 |
| ItemWeightUnits | ProductImage | |
| DangerousGood | InventoryID |
Before importing the CSV file make sure there is nothing that could cause problems such as broken rows or commas in the data.
- On the CSV page click
 to open the "New CSV Mapping" window
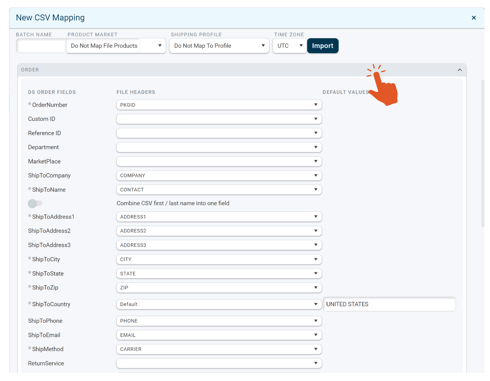
- The "New CSV Mapping" window opens.
- Enter a name for the mapping.
- Create a batch of my CSV orders - option is defaulted to enabled as this is a popular method for shipping CSV orders. Batches are an easy way to ship CSV orders and also a good way to keep track of which CSV file the orders belonged to.
- If importing into a batch, use the Batch Name Options:
- Manual batch name - instead of using the name of the file or grouping by value, use this option to enter a custom name for the batch.
- Use file name as default batch name - choose this option if you want to automatically set the file name as the batch name
- Create Batches grouped by values in a column - this option will form batches using common values from a specified column. For example, if you want to create batches by the "shipMethod" column. DesktopShipper will find all the ship method values and import them into individual batches for each of the unique ship methods.
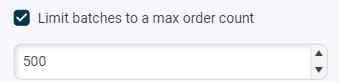
- Limit batches to a max order count - if enabled, a numerical field will display, defaulted to 500 hundred orders per batch. If the CSV file contains more than the specified limit it will continue to create additional batches that reach the max limit until it has added all orders to a batch within the limit range.
7. Choose a File - select an existing CSV file that DesktopShiper will pull in the headers from.
 Once a file has been selected, a new window will open for setting up the mapping.
- If you had selected "manual batch name", it will ask you to name the batch.
- There are also the options for mapping the products to the product database, selecting a profile for all the imported orders, and setting a different time zone than UTC.
Next step is to match up all the headers for the Order fields...
Then match up all the headers for the Line Item fields.
When all is done, click the ![]() button. Desktopshipper will add your new mapping to the list of mappings.
button. Desktopshipper will add your new mapping to the list of mappings.
A page refresh ( ![]() or click the F5 key) may be needed if the new mapping does not appear on the left of the window.
or click the F5 key) may be needed if the new mapping does not appear on the left of the window.
-3.png?width=688&height=172&name=DS%20NEW%20Logo%20(LinkedIn%20Banners)-3.png)