
GLS: Account Set Up
Credentials Needed to Set Up GLS
- Account Number
- Username
- Password
*These credentials are provided by GLS.
GLS Account Set Up in DesktopShipper
- Navigate to DesktopShipper in the web browser and log in.
- Across the top, select Settings > Carrier Accounts.
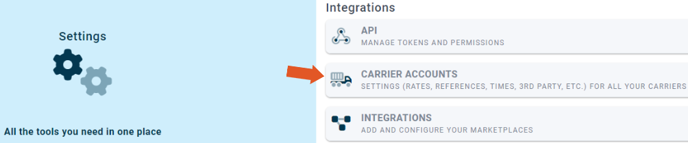
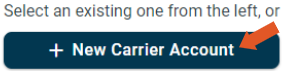
- Select "+ New Carrier Account".
- Locate GLS in the list of carriers and click "Add Account".
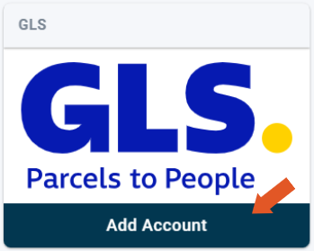
The account set up window will open.
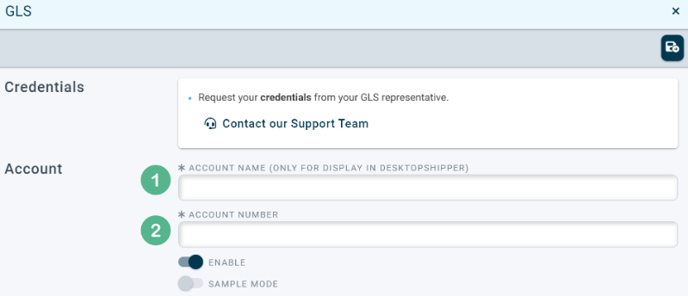
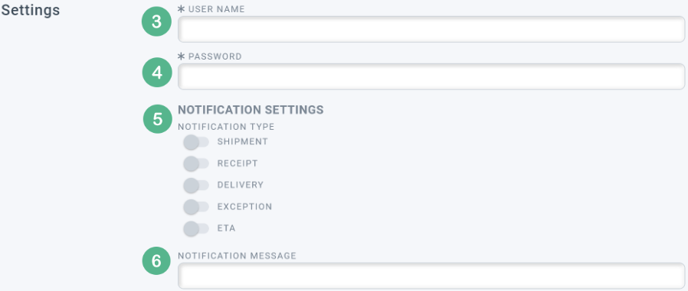 1. Enter the account name to be displayed in DesktopShipper.
2. Enter the GLS account number.
3. Enter the username associated with the GLS account.
4. Enter the password associated with the GLS account.
5. (Optional) Toggle to the right to enable any desired automatic shipping notifications.
-
- Shipment: Sends the tracking number when the label is created.
- Receipt: Sends notification when package is scanned in at shipping depot.
- Delivery: Sends notification when package is delivered.
- Exception: Sends notification if there’s an unsuccessful delivery attempt.
- ETA: Sends approximate estimated time of delivery.
6. Enter the desired message content for the automatic notifications.
Click the save button in the upper right-hand corner of the account set up window when finished.

Lastly, GLS will need to be enabled on the profile that's being used to ship GLS orders.
- Navigate to Settings > Profiles.
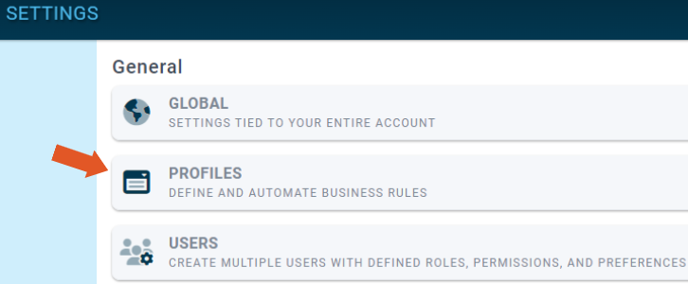
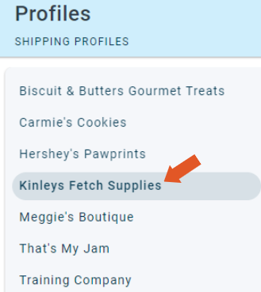
- Select the profile that will be used to ship GLS from the left-hand side.
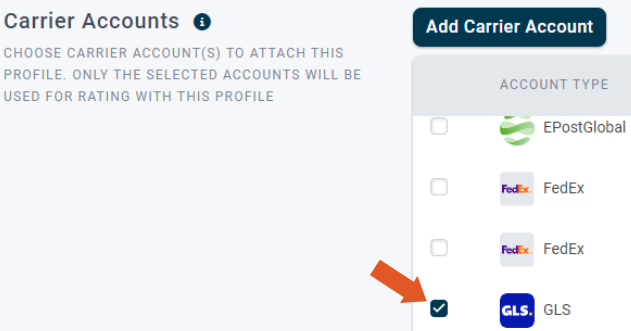
- Scroll down to the "Carrier Accounts" section.
- Check off GLS and remember to save.
You are now ready to rate and ship with GLS!
-3.png?width=688&height=172&name=DS%20NEW%20Logo%20(LinkedIn%20Banners)-3.png)