
This document provides an overview on automatic Emails in DesktopShipper.
What are Automated Emails?
Automated Emails contain custom messages and order information. They are automatically sent to the package recipient after the order is shipped.
Why are Automated Emails useful?
Automated Emails provide a hands-off way of providing customers with shipment tracking numbers, package content, and other order information.
Steps for setting up Automated Emails in DesktopShipper
- Set up Email account(s).
- Set up Email Preferences.
- Send test Email using Sample Data.
Email Accounts Set Up
In the DesktopShipper cloud, navigate to "Email Accounts" settings.
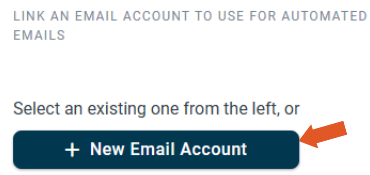
- Click "+New Email Account".
- Enter the required fields.
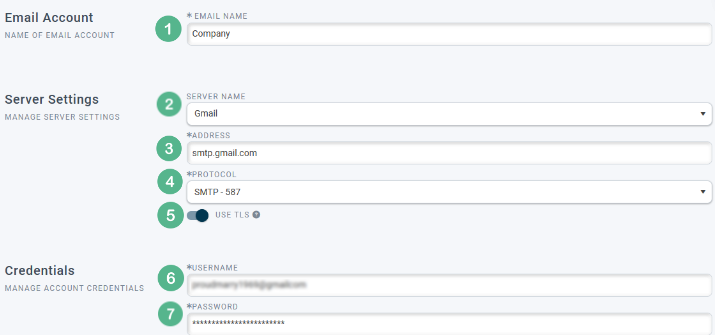
1. Arbitrary Email account name unique from any other existing Email accounts.
2. Server the Email is sent from. Examples: (@gmail.com/ @outlook.com) If the server is not listed as an available option, choose "Custom".
3. Address will auto-fill after selecting the server name.
4. SMTP is an application used by mail servers to send, receive, and relay outgoing email between senders. Select the appropriate protocol. The most common protocol is SMTP-587.
5. TLS is a widely adopted security protocol designed to facilitate privacy and data security for communications through Email. Enable TLS by toggling to the right.
6. Enter the Email account's username.
7. Enter the Email account's password.
*Remember to save.Note: If you receive an error message upon saving the Email account in DesktopShipper, the customer will need to update settings within the Email client itself. SMPT, IMAP, TLS, and POP settings are controlled within the Email client settings, not within DesktopShipper. Example: Gmail Settings.
The links below provide instructions on how to set up an Email client from within Gmail and Outlook, including enabling IMAP.
With IMAP, messages are stored in a remote server. Users can log in via multiple email clients on computers or mobile device and read the same messages.
POP, refers to a location, facility or access point that connects to and helps other devices establish connections to the internet.
Email Preferences Set Up
In the DesktopShipper cloud, navigate to "Email Preferences" settings.
- Select the Email account from the left-hand side.
- The name of Email is auto-filled to match the name of the Email account but can be changed as desired.

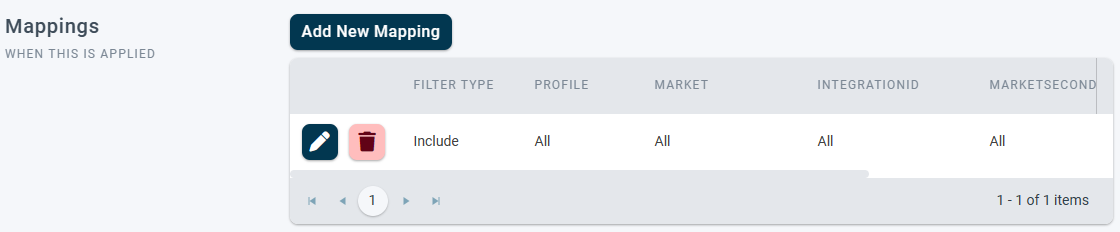
Next, click "Add New Mapping".

A mapping to send Emails for all shipments will automatically populate.
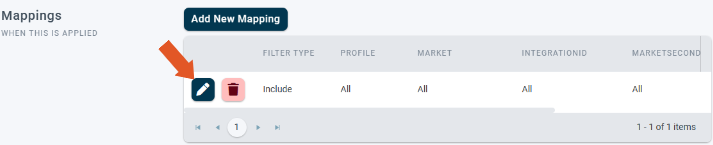
The mapping can be changed based on business needs using the edit pencil.
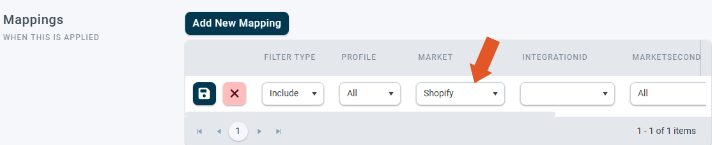
For example: Only send out automated Emails for Shopify orders.
- Fill out the "Message" section using appropriate data fields.

1. The Email address the Emails will come from. The ReturnEmail data field tells the system to use to the Email Address that is set on the return address on the profile the order was shipped with.
2. (Optional) A different Email address can be entered here if the customers would like responses to be sent to an alternative Email.
3. The Email the message will be sent to. The shipToEmail data field prompts the system to use the "Ship to" Email on the order. This means that in order for the customer to receive an automated Email they will need to have an Email address entered on the order.
4. (Optional) Fill in this field with any additional Email addresses you want to receive the Emails. Example: Email address for an accounting department.
5. Fill in what you want to be the Email's default subject line.
Next, Customize your message.
- Fill out the body of your Email.
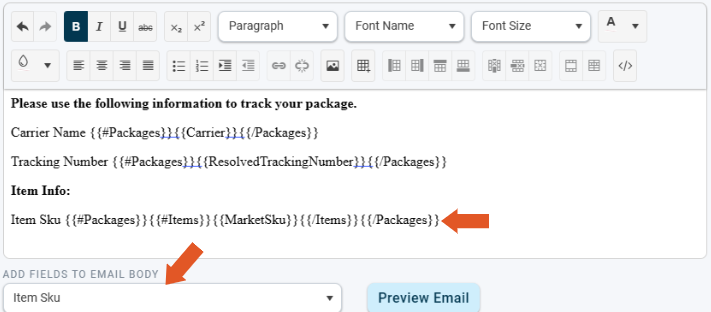
- Use the "Add Fields to Email Body" drop-down to select any order data you want included in the Email. The field will auto-populate upon selection.
In the example below, the carrier name, package tracking number, and item sku have all been inserted using the drop-down menu.
- Next, assign an available Email account to the Email preference using the drop-down.

Sending a Test Email
On the Email Preferences page, copy and paste the sample data provided below into the "Sample JSON Data" window and click "Send test Email".
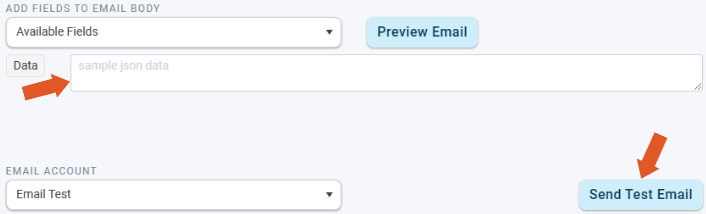
Important: You must manually change the bolded portions of the sample data to contain the correct Email addresses.
{"RequestLocalOffset":-800,"profileDescription":"Default","ReturnEmail":"sample@email.com","ReturnCompany":"Sample Company","ReturnPhone":"888.888.8888","ReturnCity":"City","ReturnState":"State","ReturnPostalCode":"12345","ReturnCountry":"US","ReturnAddr1":"Sample Street","ReturnAddr2":null,"locationDescription":"Warehouse","locationEmail":"sample@email.com","locationCompany":"Sample Company","orderNumber":"TEST00001","orderWeight":1,"shipToAddress1":"123 Main Street","shipToAddress2":null,"shipToAddress3":null,"shipToCity":"City","shipToState":"State","shipToPostalCode":"12345","shipToPhone":"888.888.8888","shipToName":"Sample Customer Name","shipToCountry":"US","shipToCountryName":"United States","shipToEmail":"sample@email.com","sellerCompany":null,"sellerName":null,"sellerAddress1":null,"sellerAddress2":null,"sellerAddress3":null,"sellerCity":null,"sellerState":null,"sellerPostalCode":null,"footerMessage":null,"sellerEmail":null,"sellerLogo":null,"billingAddress1":null,"billingAddress2":null,"billingAddress3":null,"billingCity":null,"billingState":null,"billingPostalCode":null,"billingCountry":null,"billingName":null,"Packages":[{"PackageId":"1234567890","Label":"Package 1","Weight":1,"CustomReference1":null,"CustomReference2":null,"CustomReference3":null,"ManualShipmentMarketReference":null,"Reference1":2,"Reference2":6,"Reference3":0,"Carrier":"USPS","CarrierService":"Priority","EstimatedDelivery":"6 days","EstimatedDeliveryDays":6,"EstimatedDeliveryDate":"Tuesday, May 26, 2020","EstimatedDeliveryTime":"7:00 AM","ResolvedTrackingNumber":"8888888888888","Items":[{"AdditionalInformation":null,"ASIN":null,"Brand":null,"CustomsDescription":"Sample","GiftMsg":null,"GiftNotes":null,"Manufacturer":null,"MarketSku":"123","MarketTitle":"Sample","OrderedQty":1,"PrimaryImageURL":null,"ProductSku":"123","ShippedQty":0,"UPC":null}],"Labels":[{"LabelDataBase64":"iVBOR...","LabelFormat":"PNG","LabelSequence":1,"LabelSize":"4x6","LabelStoredURL":"https://fake.url/label.pdf","IsReturnLabel":false,"NoLabelData":false,"ReturnLabelWasEmailed":false}]}]}
Additional Important Info
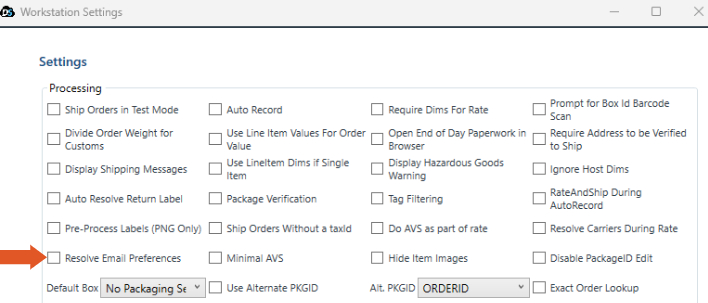
In order for automated Emails to be sent for orders that are shipped in DSX, "Resolve Email Preferences" must be enabled in the workstation settings.
-3.png?width=688&height=172&name=DS%20NEW%20Logo%20(LinkedIn%20Banners)-3.png)