
Steps for installing the DSX application
Step 1:
- Copy the link https://s3-us-west-2.amazonaws.com/dsx-installer/Windows/Dev/1.1.0.697/install.msi and paste it into a web browser.
Note: The last three numbers of the version of DSX in the link 1.1.0.697 can be changed manually to reflect the current version of DSX. If you are unsure of the current version, you can download the version of DSX you have and check for updates from within the application.
- Run the file that's been downloaded. The installer file will be in the user's downloads folder.
For Google Chrome users, click the icon to install.

For Microsoft Edge users, install.msi file may not be "trusted". You may need to indicate that the file is safe for download by clicking on the three dots.

- Run the DSX installer. You will see a Windows warning box. Click "More Info" then "Run Anyway" to start the installer.

Step 2:
- Select the following settings in the menu.

Step 3:
- Sign in to DSX with an existing DesktopShipper username and password.

- Select the endpoint for your DesktopShipper account.
Customers on Portal (portal.desktopshipper.com) use https://io.desktopshipper.com endpoint.
Customers on Ship (ship.desktopshipper.com) or V2 (shipV2.desktopshipper.com) use the https://next_io.desktopshipper.com endpoint.

- Slick "Save" and accept the user Agreement on the next screen.
How to Update DSX
- Select the three lines in the upper-left hand corner of DSX.
- Select "Settings".

Then select "Admin Settings".

Note: Different user levels have different permissions. If you are not an Admin user, you will likely need one to log in to open the Admin settings window. If you do not have current access to an Admin user, contact our Support team to assist.
- Click "Check for Update" button.

*In some cases, antivirus software may block the download of the update.
Additionally, you can update DSX manually from the file location.
Note: You will need to be closed out of the DSX application to use this method.
- Navigate to the DSX folder in your file explorer.
- Right-click into the blank space to add a new file.
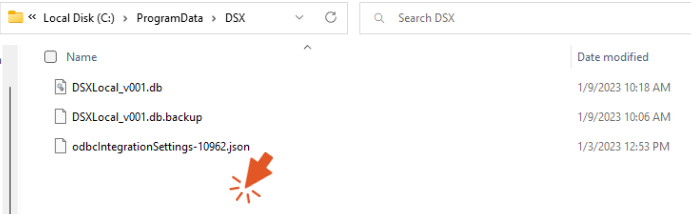
- Add a new "Text Document"


- Rename the new Text Document to UPDATE in all capital letters.
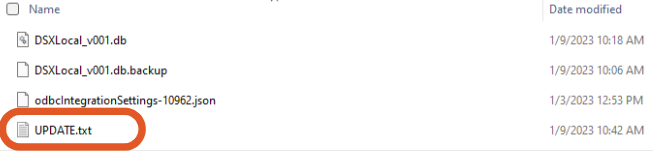
- Close out of the filter explorer and re-open DSX. This will prompt the installer to search for and run any updates.
*The UPDATE.txt file will automatically disappear from the DSX folder after the update is performed.
-3.png?width=688&height=172&name=DS%20NEW%20Logo%20(LinkedIn%20Banners)-3.png)