
This document provides an overview of using Canada post in DesktopShipper.
What is Canada Post?
Canada Post is the largest and most popular shipping carrier for shippers located in Canada. The service offers on-time delivery guarantees, tracking, and signature options. Canada Post ships domestically (within Canada), to the United States, and internationally to over 190 countries.
Note: Assistance from Implementation is required to finalize setup of Canada Post on the DesktopShipper account.
Canada Post in DesktopShipper
Canada Post rates are obtained from the Canada Post API.
Canada Post labels are obtained from the Canada Post API.
Available Ship Methods
Within Canada
CAN10: Expedited Parcel
CAN11: Regular Parcel
CAN12: Priority
CAN13: Xpresspost
Canada to US
CAN01: Expedited Parcel USA
CAN02: Priority Worldwide Envelope USA
CAN03: Priority Worldwide pak USA
CAN04: Priority Worldwide parcel USA
CAN05: Xpresspost USA
CAN06: Expedited Parcel USA
CAN07: Tracked Packet - USA
CAN08: Small Packet USA Air
International Services
CAN21: Xpresspost International
CAN22: Priority Worldwide Envelope INT'L
CAN23: Priority Worldwide pak INT'L
CAN24: Priority Worldwide parcel INT'L
CAN25: International Parcel Air
CAN26: International Parcel Surface
CAN27: Tracked Packet - International
CAN28: Small Packet International Surface
CAN29: Small Packet International Air
Steps for Setting up Canada Post in DesktopShipper
1. Sales will quote the setup fee.
2. After the quote is approved by the customer, an Imp tech is assigned.
3. A deal will be created with Canada Post onboarding form attached. Implementation tech will have to request the customer's required info.
4. Add a Canada Post account and fill out the required settings.
5. After Canada Post generates a account number, enter it in the Canada Post settings.
6.Test rating and shipping several orders.
7. Run EOD and confirm the close was successful.
Adding a Canada Post Account
- Navigate to Settings and click "Carrier Accounts".

- Click "+New Carrier Account".
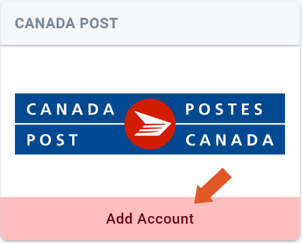
Select Canada Post from the list.
Fill in the fields.
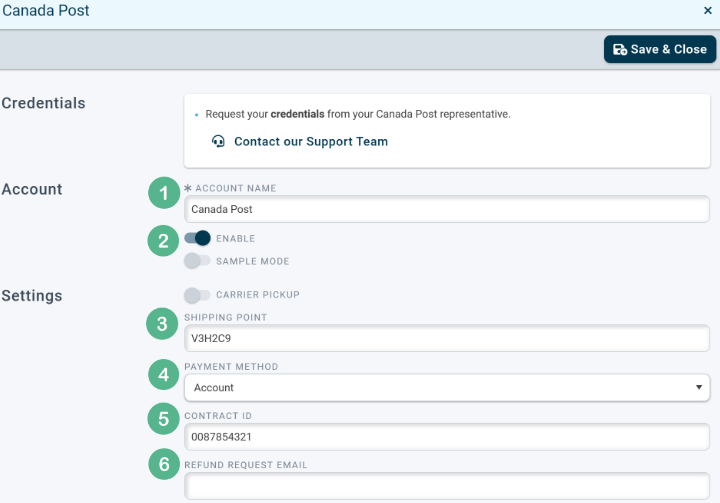
1. Enter a unique "Account Name" to individualize all Canada Post accounts.
2. Toggle to the right to enable the account. Enabling sample mode will create fake postage only.
3. (Optional) Enable "Carrier Pickup" if the customer wants Canada Post to pickup packages at their facility.
4. (Optional) A "Shipping Point" is a local location where the customer can drop off their packages as well as pick up shipping supplies. The customer can obtain a shipping location number though Canada Post's website or app.
5. (Optional) Select the type of Payment Method the customer wishes Canada Post to bill with.
6. (Optional) If the customer has a contract with Canada Post for discounted rates, their "Contact ID" links them to that contract.
7. (Optional) The "Refund Request Email" is the email address that Canada Post will use to communicate with the customer if they submit a refund request with the carrier.
Once you save the settings you will be navigated to Canada Posts login page.
- Log in to Canada Post.
Canada Post will create an account number.
- Once you have obtained the account number, manually enter it into the "Account Number" field.
Viewing Canada Post in DesktopShipper
The following icon on the order grid indicates a Canada Post order.

Canada Post Label

-3.png?width=688&height=172&name=DS%20NEW%20Logo%20(LinkedIn%20Banners)-3.png)