
How to integrate with WooCommerce:

Integration Access Requirements
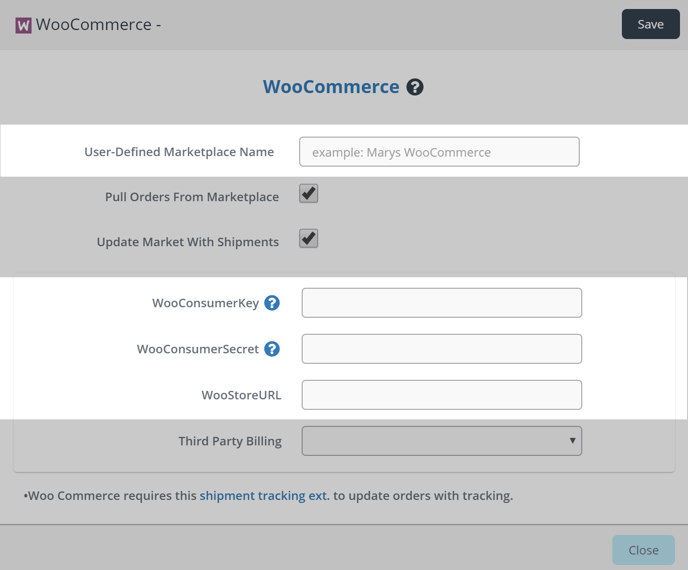
- Consumer Key
- Consumer Secret
- URL
Definitions
User-Defined Marketplace Name: The name you give your new integration.
Pull Orders From Marketplace: Begin pulling down your orders from WooCommerce into your DesktopShipper order manager.
Update Market With Shipments: Whenever you ship orders through DesktopShipper, the shipment information will be written back to WooCommerce.
Update Market With Shipments: Whenever you ship orders through DesktopShipper, the shipment information will be written back to WooCommerce.
Get WooCommerce API Keys
Enable REST API
1) Login to your Dashboard.
2) Go to WooCommerce > Settings > API tab.
3) Select the Enable REST API checkbox.
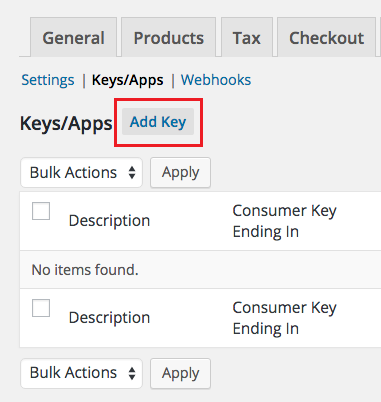
Add Key
1) Go to WooCommerce > Settings > API > Keys/Apps.
2) Select Add Key.
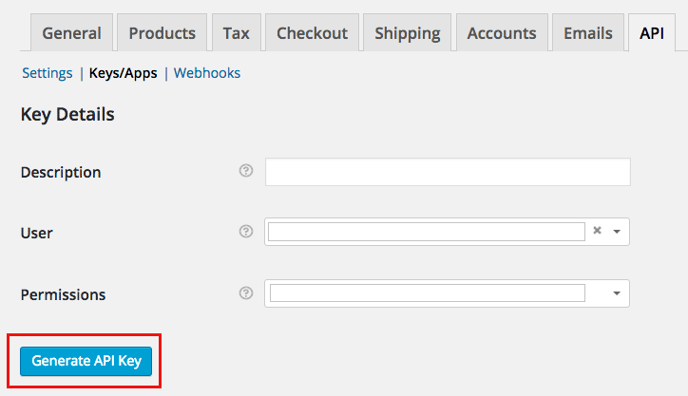
3) Select the User and add a Description. It may require them to have an Admin Role.
4) Then select access level Permissions (Read, Write, or Read/Write).
5) Click the Generate API Key button.
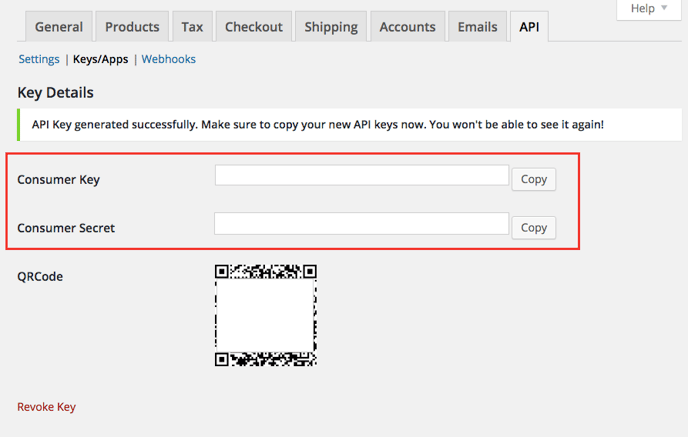
6) WooCommerce will generate your Consumer Key and Consumer Secret.
Add new Integration Instance
1) Login to your DS Cloud account.
2) Go to Settings > Integrations and click Add.
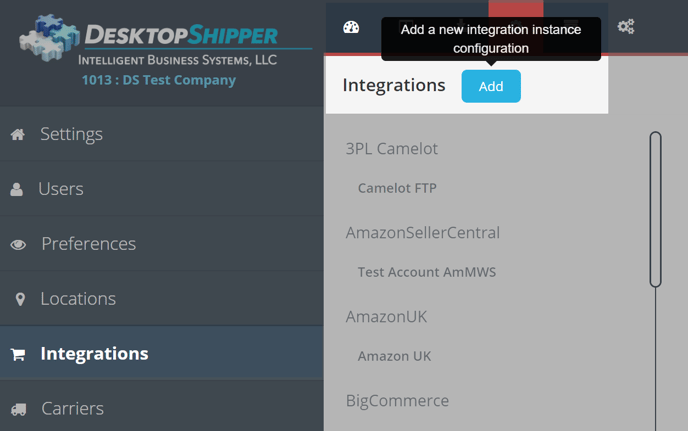
3) Select WooCommerce from the "Add Integration" modal.
4) In the modal, give your new integration a name(User-Defined Marketplace Name).
5) Enter your WooCommerce Consumer Key, Consumer Secret, and URL.
6) When you're finished, click Save.
Shipment Tracking Extension
Install
1) Login to your WordPress admin panel.
2) Install the latest version of WooCommerce if you haven't already.
3) Unzip and upload the plugin's folder to the /wp-content/plugins/ directory.
4) Activate the Shipment Tracking extension through the Plugins menu in WordPress.
Purchase