
This document provides an overview for setting up Acumatica in DesktopShipper.
Adding Acumatica to DesktopShipper
- On ShipV2, navigate to the integration settings page.

- On the integrations settings page, click the "+ New Integration" button.
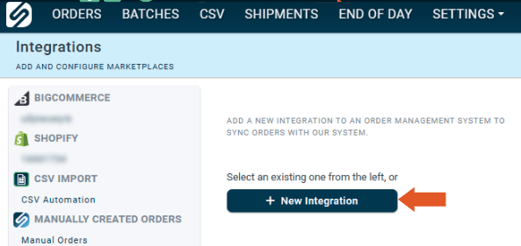
The "Create New Integration" window will open.
- Select Acumatica from the list of available integrations.
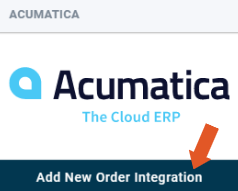
The "New Acumatica Account" window will open.
Account Section:
- Enter a unique User Defined Name.
- Enter the Acumatica ERP Instance URL you noted from the Authentication Procedure.

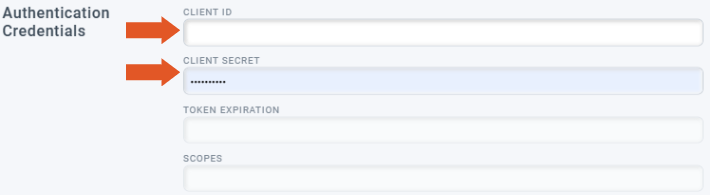
Authentication Credentials Section:
- Enter the Client ID obtained from the customer's Authentication Procedure.
- Enter the Client Secret noted in the Authentication Procedure.
The Settings section:
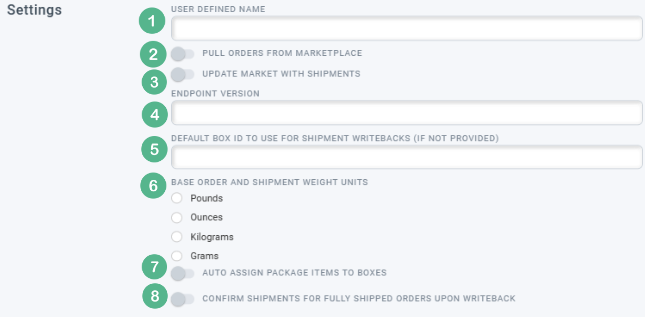
1. Enter a User Defined Name.
2. Enable Pull Orders From Marketplace to allow the system to import orders from Acumatica.
3. Enable Update Market with Shipments to allow the system to writeback shipment info to Acumatica.
4. Enter the Endpoint Version. If left empty, DesktopShipper will obtain and auto-set the Endpoint Version from the customer's Acumatica account.
5. If no Box ID is provided in the order info request, The Default Box ID, will write back to Acumatica.The Box IDs are found on the customer's Acumatica account site on the "Boxes" page.
When posting new or updated shipment packages, the precedence when setting the box ID is as follows:
- Box ID used for package during shipping.
- The value set in this setting.
- The pre-existing box ID set on the given package in Acumatica (if applicable).
- The BoxID setting determines the default for step #2.
Note: The valid box IDs that Acumatica accepts is listed under the customer's account’s “Boxes” page.
Example Value: “Large”
6. Select the weight unit type for the base orders and shipments.
7. (Optional) Auto Assign Package Items to Boxes is used If the customer has orders with unshipped pre-allocated packages with items assigned, we will auto-map them in if enabled.
8. (Optional) Confirm Shipments for Fully Shipped Orders Upon Writeback is used for DTS-fulfilled orders that are entirely shipped and all contained packages have “Created” statuses. Toggles whether or not the system sends a request to confirm the shipment(s) (to move it to “Confirmed” status)
- Once the fields are completed, click save.
DesktopShipper will automatically attempt a token renewal. If successful, it will redirect you back to the integration page.
You should now see the Token Expiration and scopes first populated.
Link Acumatica Account to Profile
- Navigate to the profile settings page.
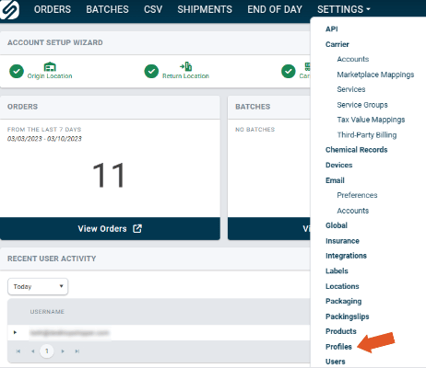
- Select the profile you want to associate with the Acumatica account.
- Check the box next to the integration.
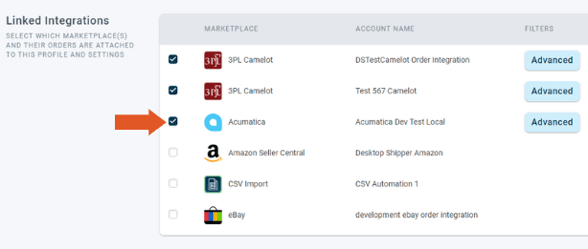
- Remember to save.
Note: To link the Acumatica to multiple accounts or target specific secondary marketplaces, see the Duplicate Integrations section of our related article on Profile setup: How to Set Up a Profile
-3.png?width=688&height=172&name=DS%20NEW%20Logo%20(LinkedIn%20Banners)-3.png)